What’s New? API Plugin in ProtoPie Connect
Connect to databases and APIs. Bring real data into your ProtoPie prototypes!

We are thrilled to introduce an exciting feature in ProtoPie Connect: the API plugin is now here!
You can now easily connect your prototypes to databases and APIs, bringing real data into your ProtoPie projects and vice versa.
The best part? You don't need to worry about coding. Our API plugin does all the work for you—whether it's sending data to APIs or fetching data from them, and it seamlessly brings it into your prototypes.
The new API plugin is accessible for both Pro and Enterprise plan users. For teams on the Enterprise plan, there's an extra benefit – you can connect to multiple APIs at the same time.

📣 Join us on Tuesday, September 19th, for an exclusive webinar, where we'll guide you through the simple process of connecting your prototypes to databases and APIs.
By demonstrating a range of real-world examples, we'll unveil how the API plugin can elevate and energize your design process.
How the API plugin enhances your workflow
The API plugin enables design teams to easily initiate API requests, either GET or POST, and establish two-way connections with any kind of API:
- Public APIs: This encompasses a wide range of popular services, including Spotify, OpenWeatherMap, YouTube, ChatGPT, live scores, and many more.
- Internal APIs: Connect seamlessly with your organization's internal systems and services.
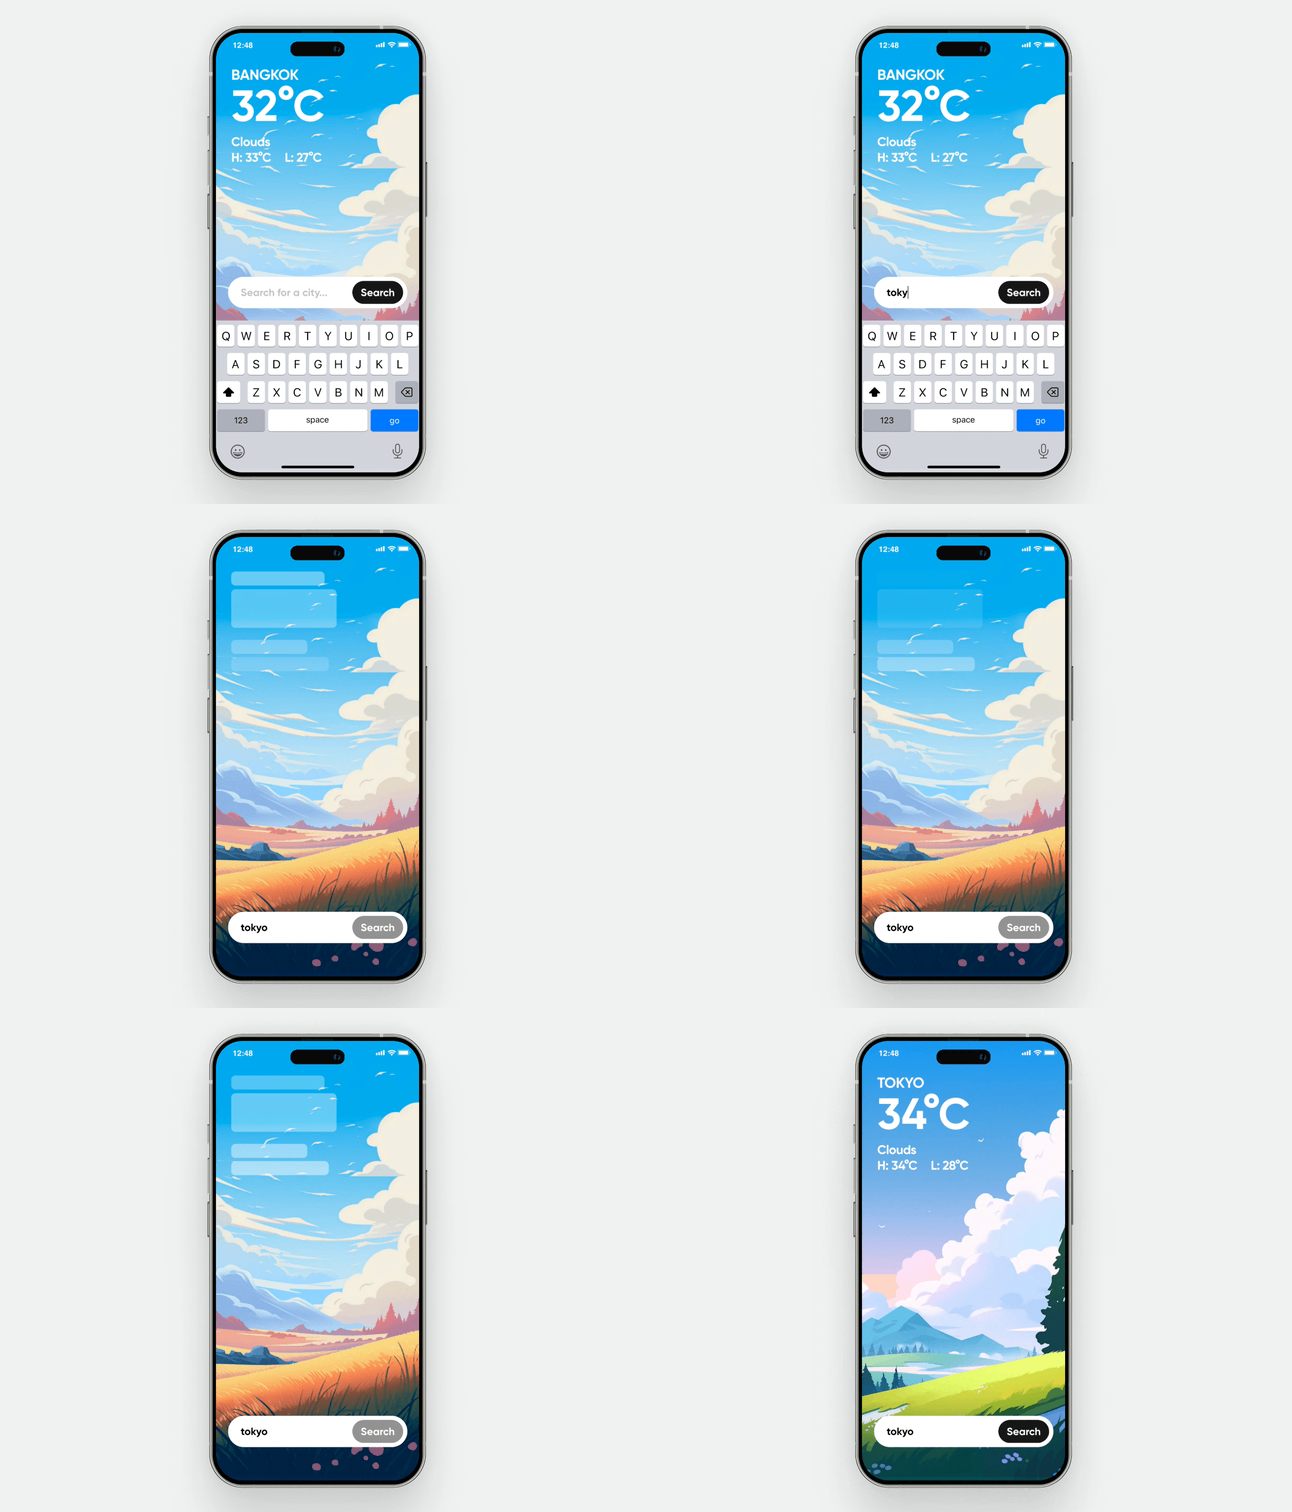
For example, you can now connect your ProtoPie prototypes to any weather API and dynamically display accurate and real-time weather updates based on specific locations.
How to initiate API requests in ProtoPie
Gone are the days when connecting to APIs was limited to the Enterprise plan and needed code writing and custom plugins in ProtoPie Connect. Now, with the API plugin, initiating API requests is a breeze for anyone on the Pro or Enterprise plan!
Configuring API settings
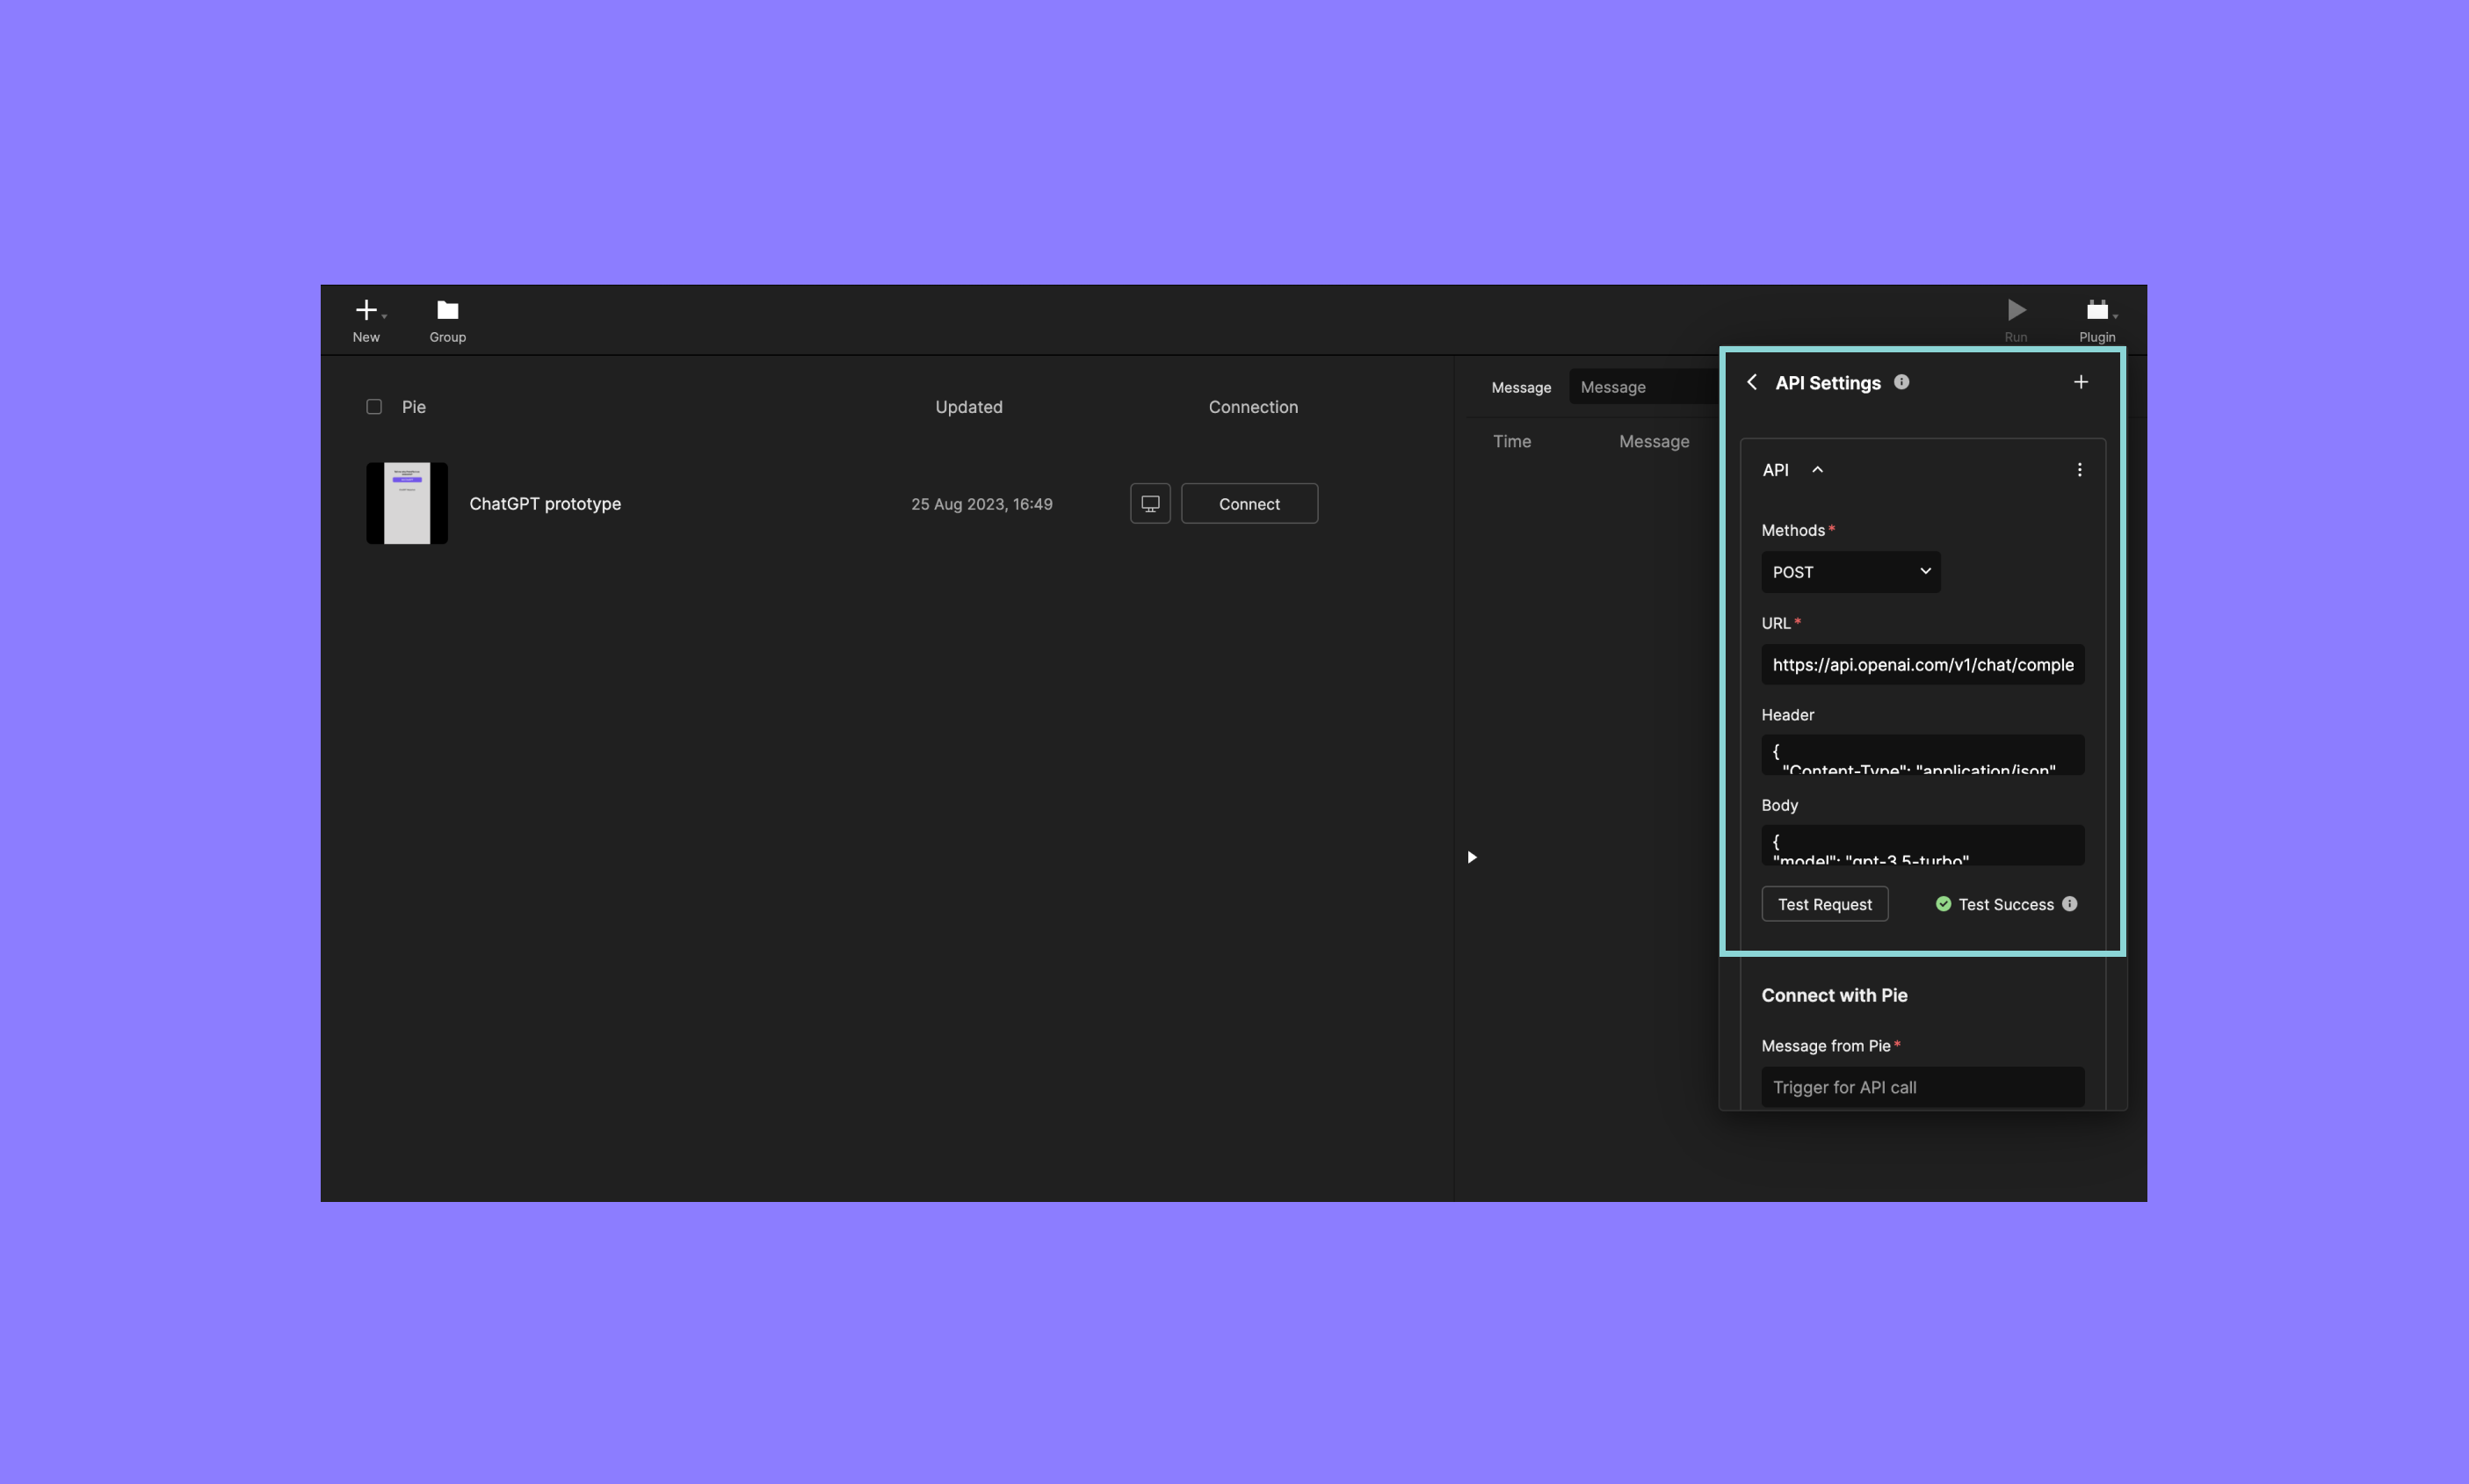
You must enter a valid API URL to connect to APIs via the API plugin. This URL serves as the gateway to the API's services.
If the API needs more information to handle requests, you can include a Header and Body along with the API URL. Think of these as additional notes you send with your request.
- The
Headermust be formatted in JSON {}, but theBodydoesn't always need to follow JSON {} format. You can enter theBodyin JSON {} format if the API demands it.
You can refer to your chosen API's online documentation to find the right API URL and any required parameters. It will guide you on how to properly set things up for successful communication.
Connecting via Send and Receive messages
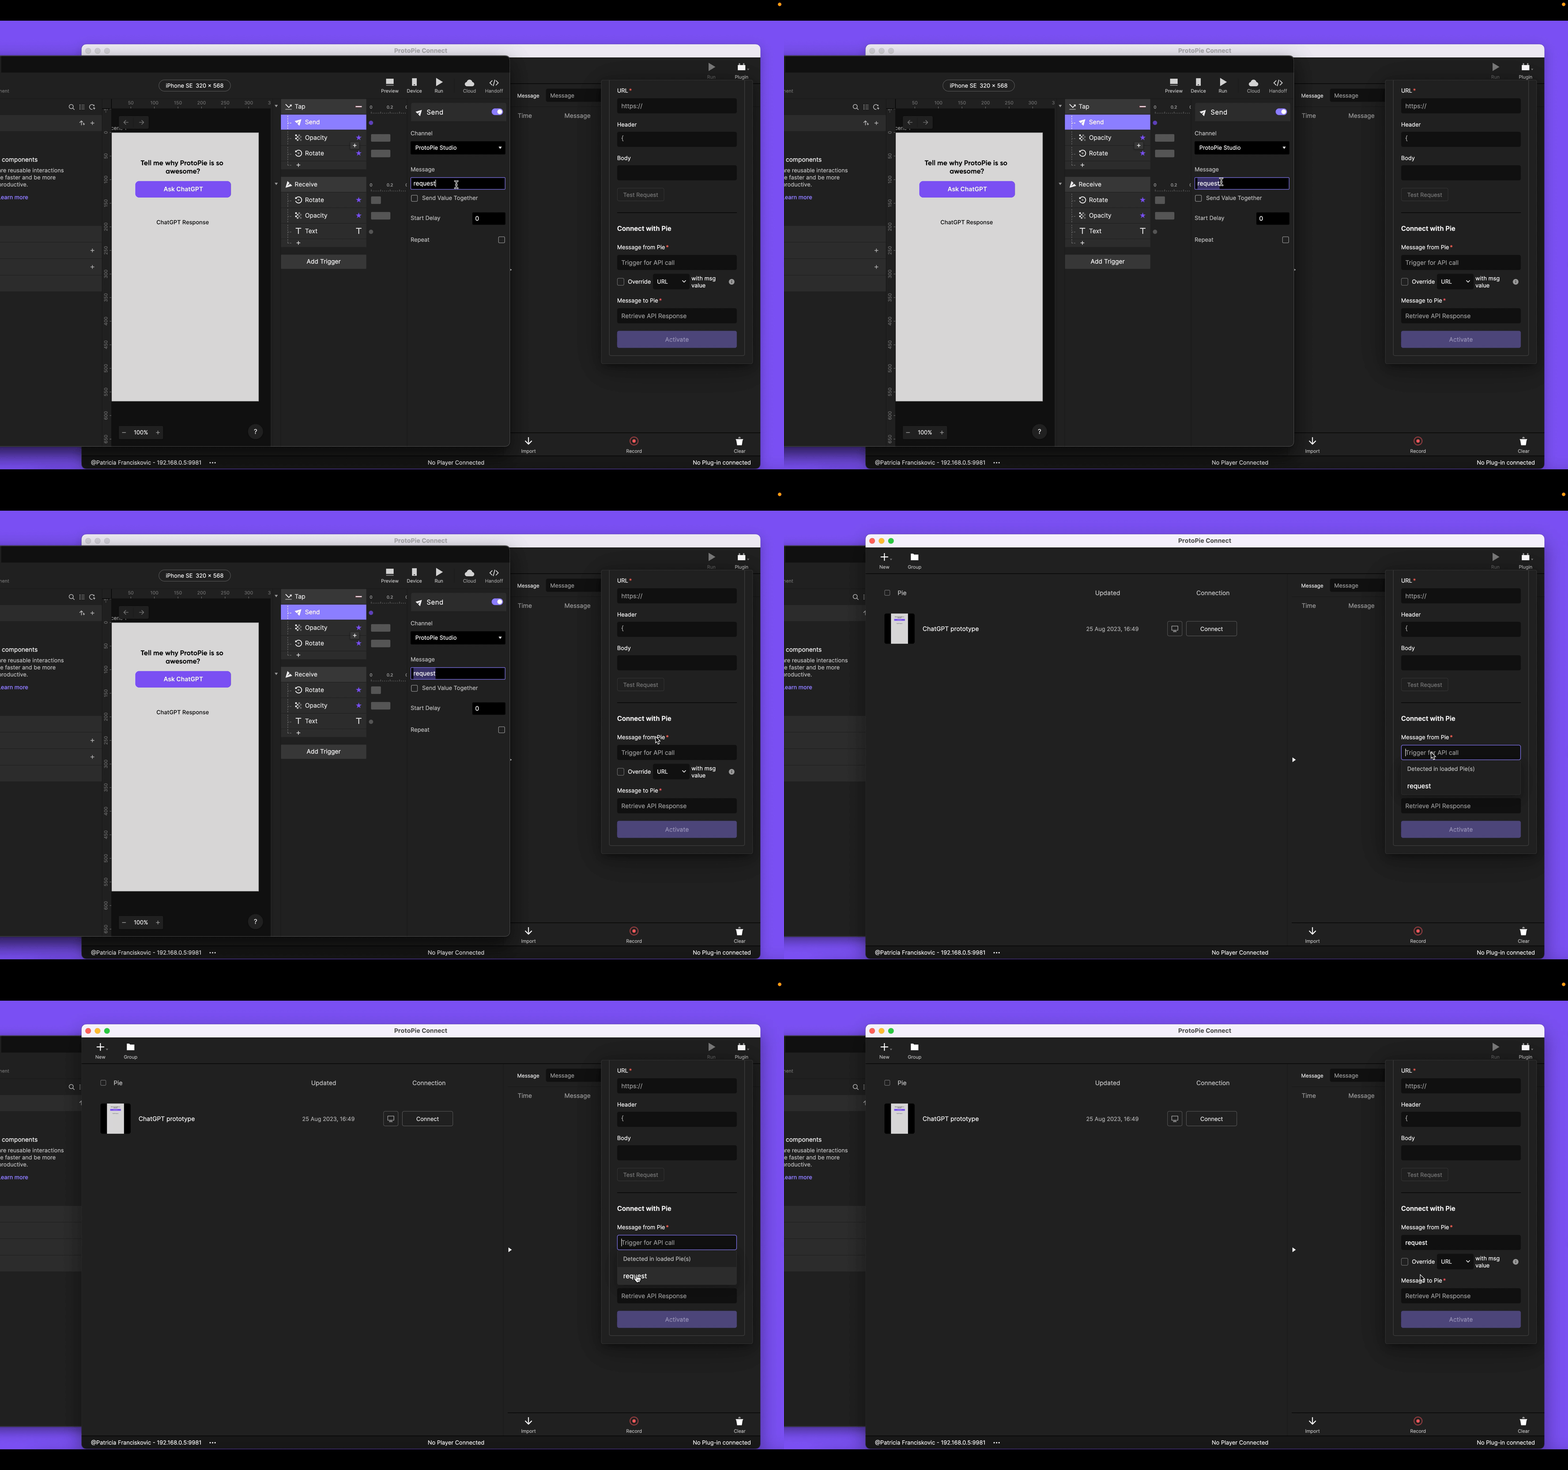
In ProtoPie, API requests are initiated through Send messages that you configure in ProtoPie Studio.
When you open prototypes in ProtoPie Connect, the API plugin automatically detects the messages within them. These messages will be displayed in the menu “Message from Pie”, allowing you to easily select them within the API plugin.
Learn more about setting up Send & Receive messages in ProtoPie Connect through our Complete Guide to ProtoPie Connect.
The activated API returns a response that is sent back to the prototype, where it can be used to trigger actions. To utilize the output from an API in your prototypes, you need to use the Receive trigger and assign the value to a text variable in ProtoPie Studio.
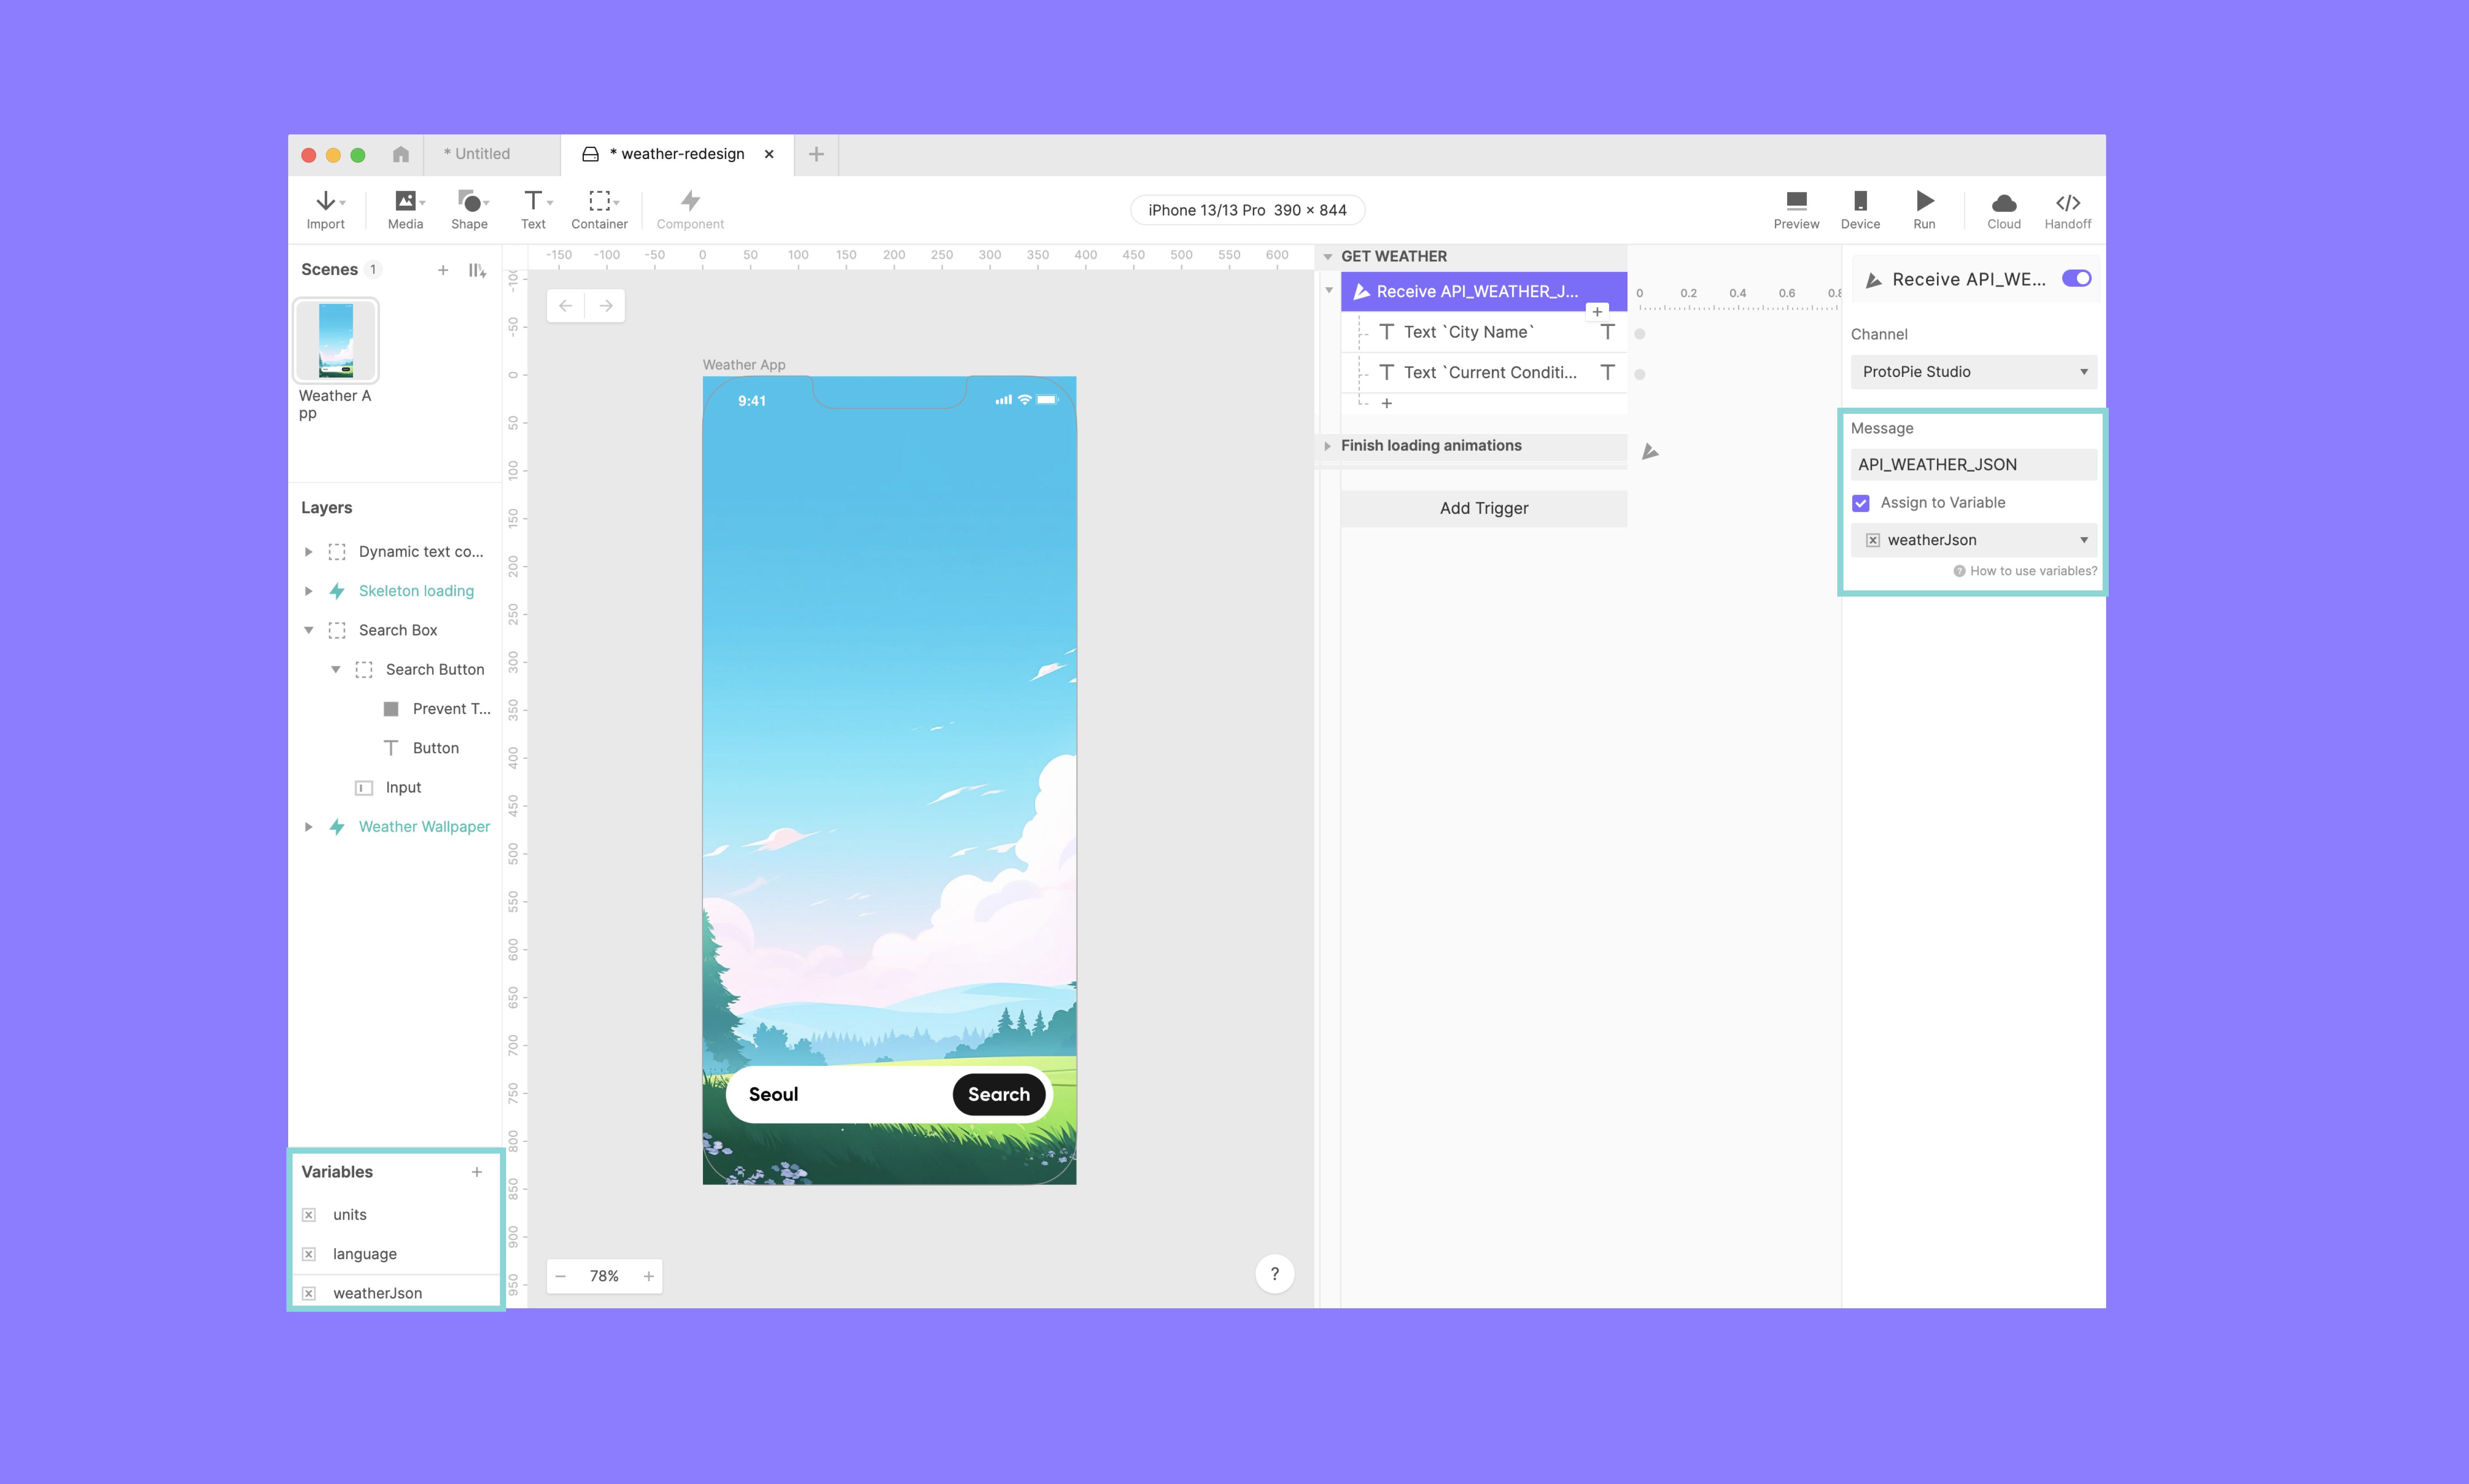
The information obtained from APIs, stored in variables, can be reused through responses in ProtoPie Studio. The Text response, along with a parseJson formula, works well for handling API outputs, which are often in JSON format. It's worth mentioning that while many APIs respond in JSON, not all of them do. The API Plugin simply sends through whatever response it gets—most APIs these days happen to respond with JSON.
For example, if you open this prototype in ProtoPie Connect and set up the API plugin as detailed in its Information section, you'll notice that the prototype triggers an API request to Useless Facts when you select an option using the toggle switch. As a result, the prototype displays the information retrieved from the Useless Facts API on the screen.

Check out our step-by-step guide on initiating API requests using the API plugin in ProtoPie Connect.
Overriding parameters with message values
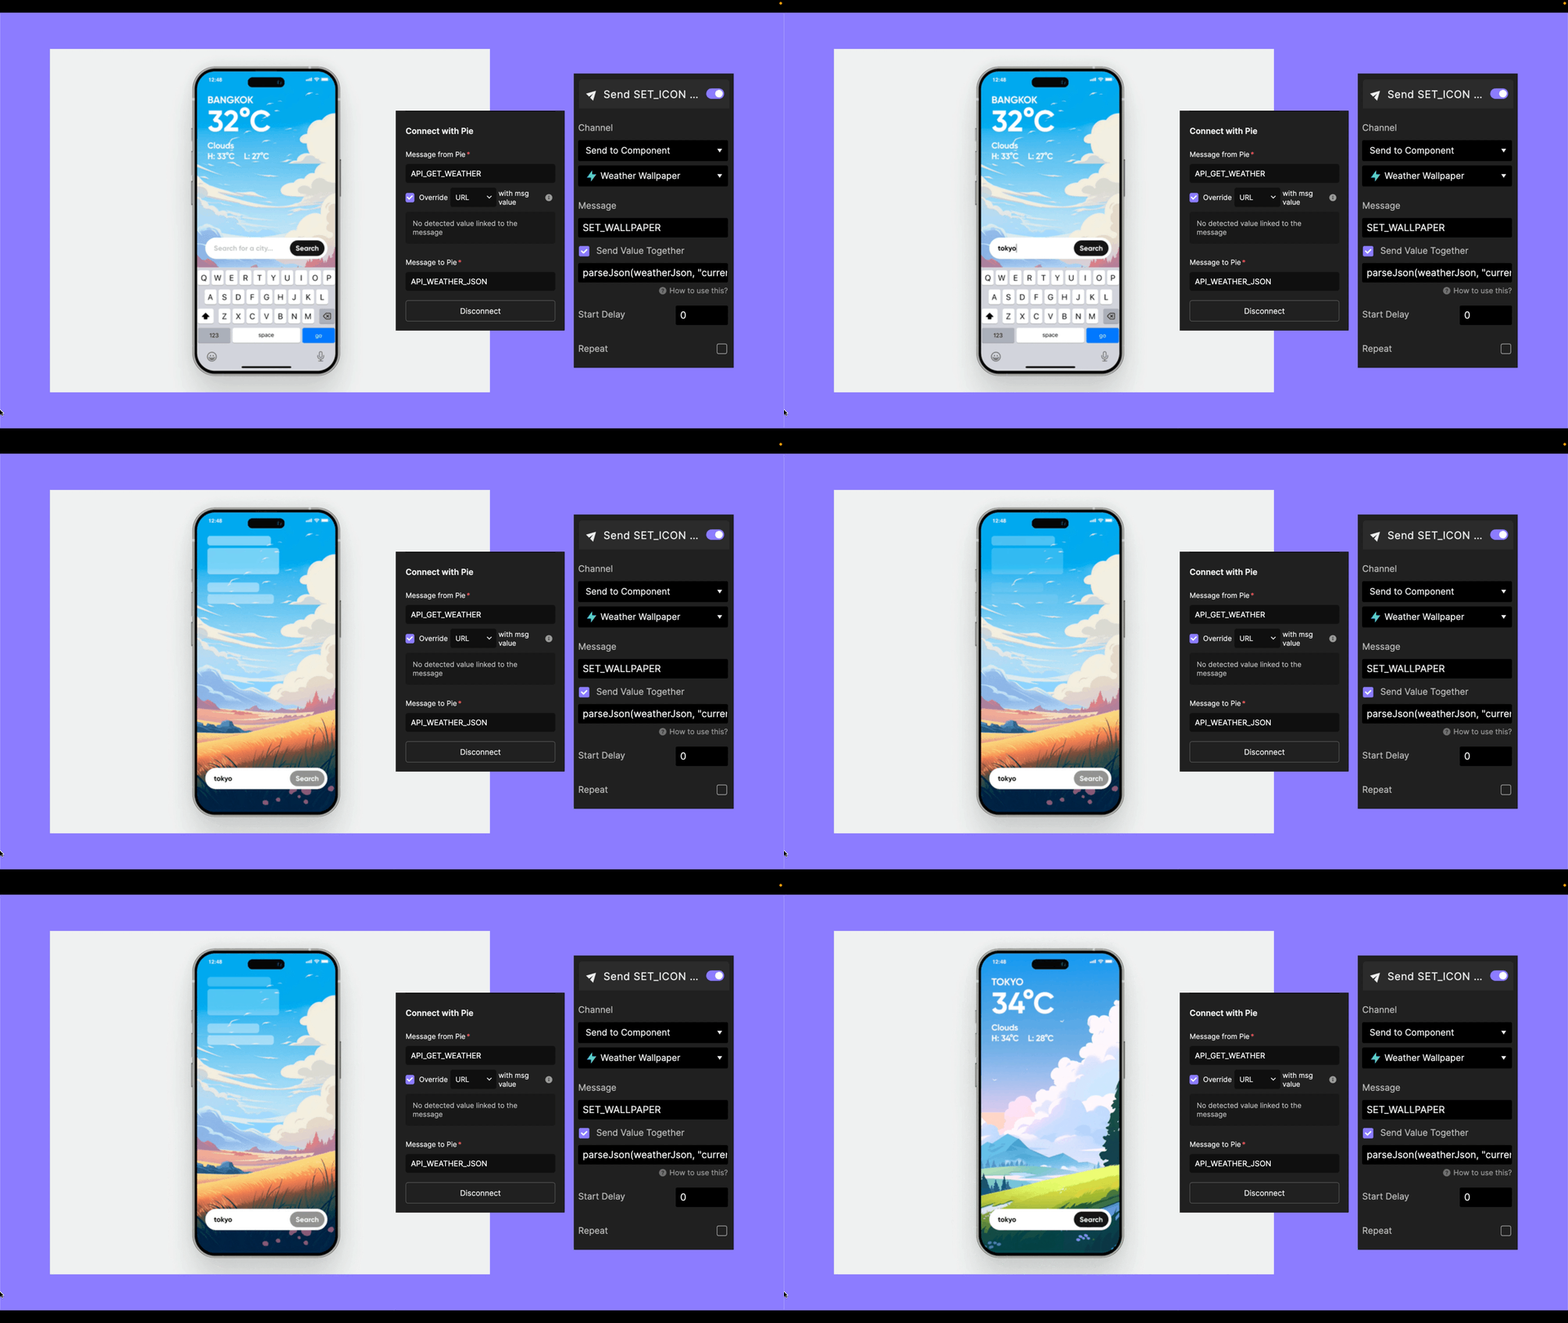
The option “override API URL/Header/Body with message value” allows you to dynamically override the API’s URL or Header/Body parameters with the value of the message sent from the prototype.
This functionality comes in handy when you need to make multiple calls to the same API but with varying URLs or Header/Body values.
In this example prototype, we used this feature to override the API URL with the value from the message sent in the Pie file. As a result, when you type a city into the search box, you'll see the precise weather information for that city.
Running multiple API requests simultaneously
Enterprise-only feature
Teams on the Enterprise plan have the flexibility to execute multiple API requests simultaneously within the API plugin. This capability allows you to enhance your real data prototyping by connecting your prototype to various APIs at once.
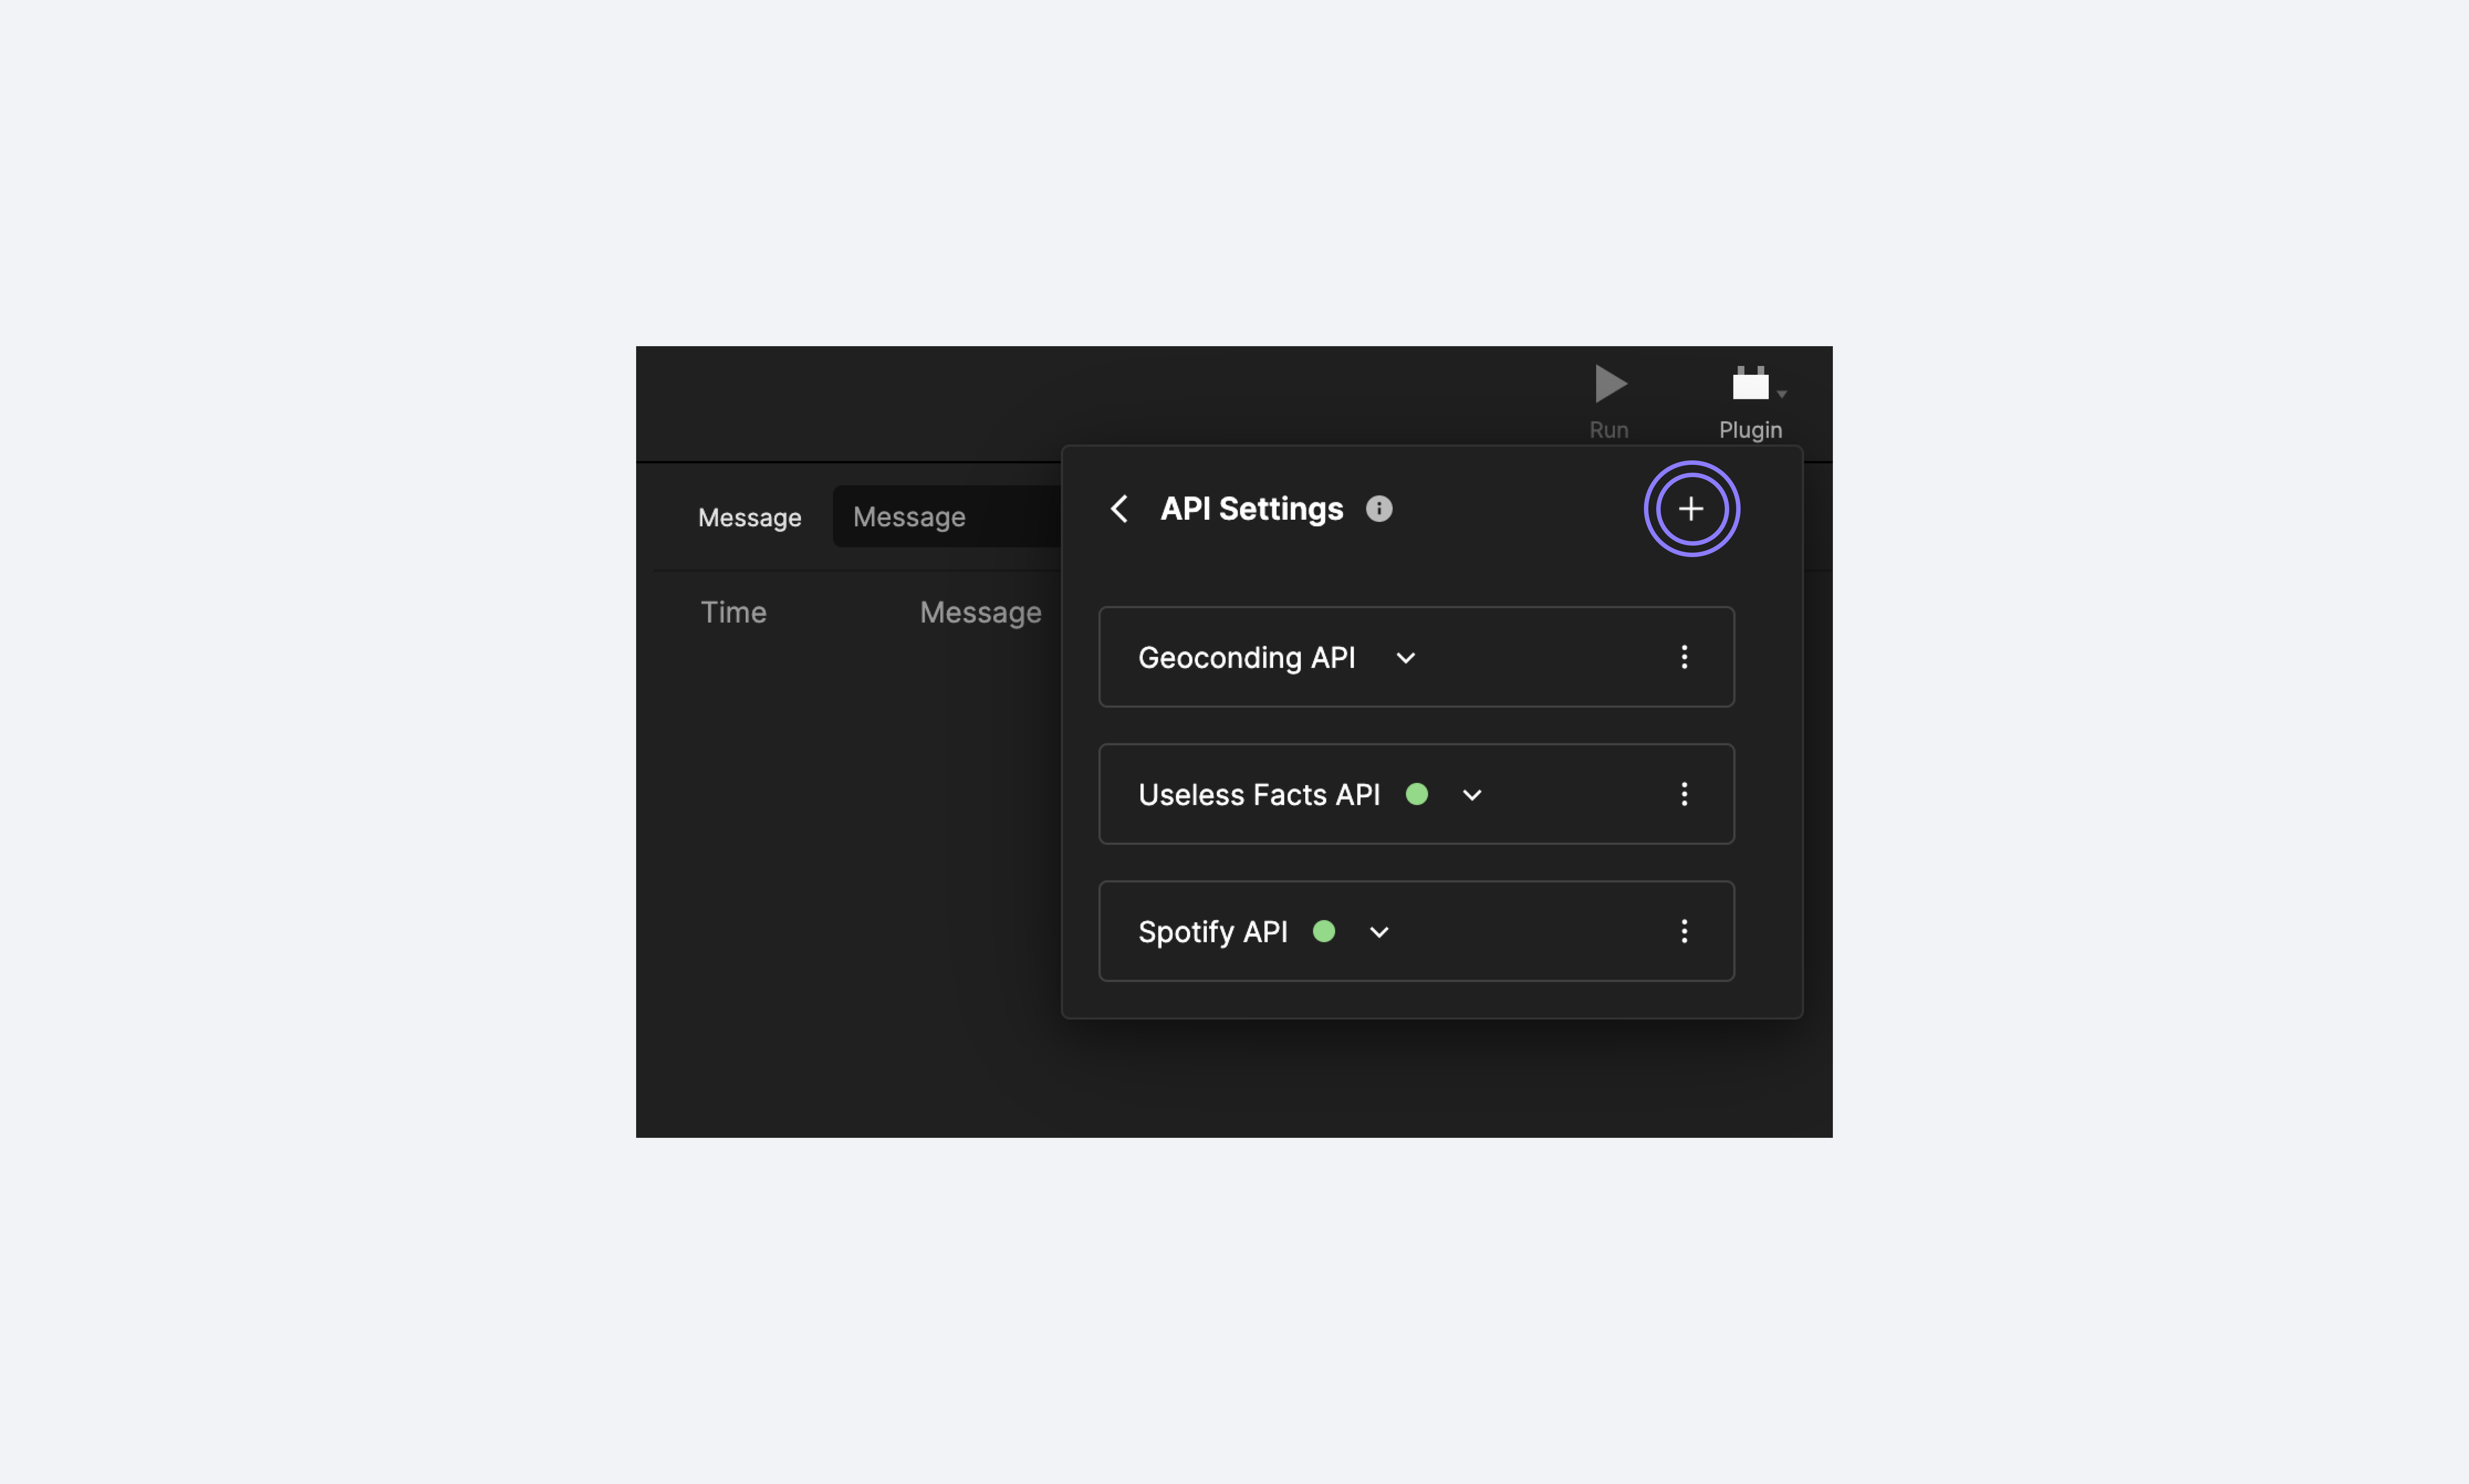
The ProtoPie API Plugin empowers you to infuse your designs with real, dynamic data, taking your prototypes to a whole new level of realism and functionality. Create interactive and data-driven prototypes that showcase your vision in its truest form.
Elevate your designs with ProtoPie’s powerful prototyping capabilities
ProtoPie is the ultimate tool that will propel your prototypes to new heights. Unleash the potential of your designs by incorporating real interactions that will leave stakeholders and viewers in awe.
Experience the cutting-edge features of ProtoPie by trying it for free today.
.jpg)

.jpg)