Game UI Tutorial with ProtoPie Connect Unity Plugin
Follow this tutorial to create an interactive game UI experience using the ProtoPie Unity plugin.

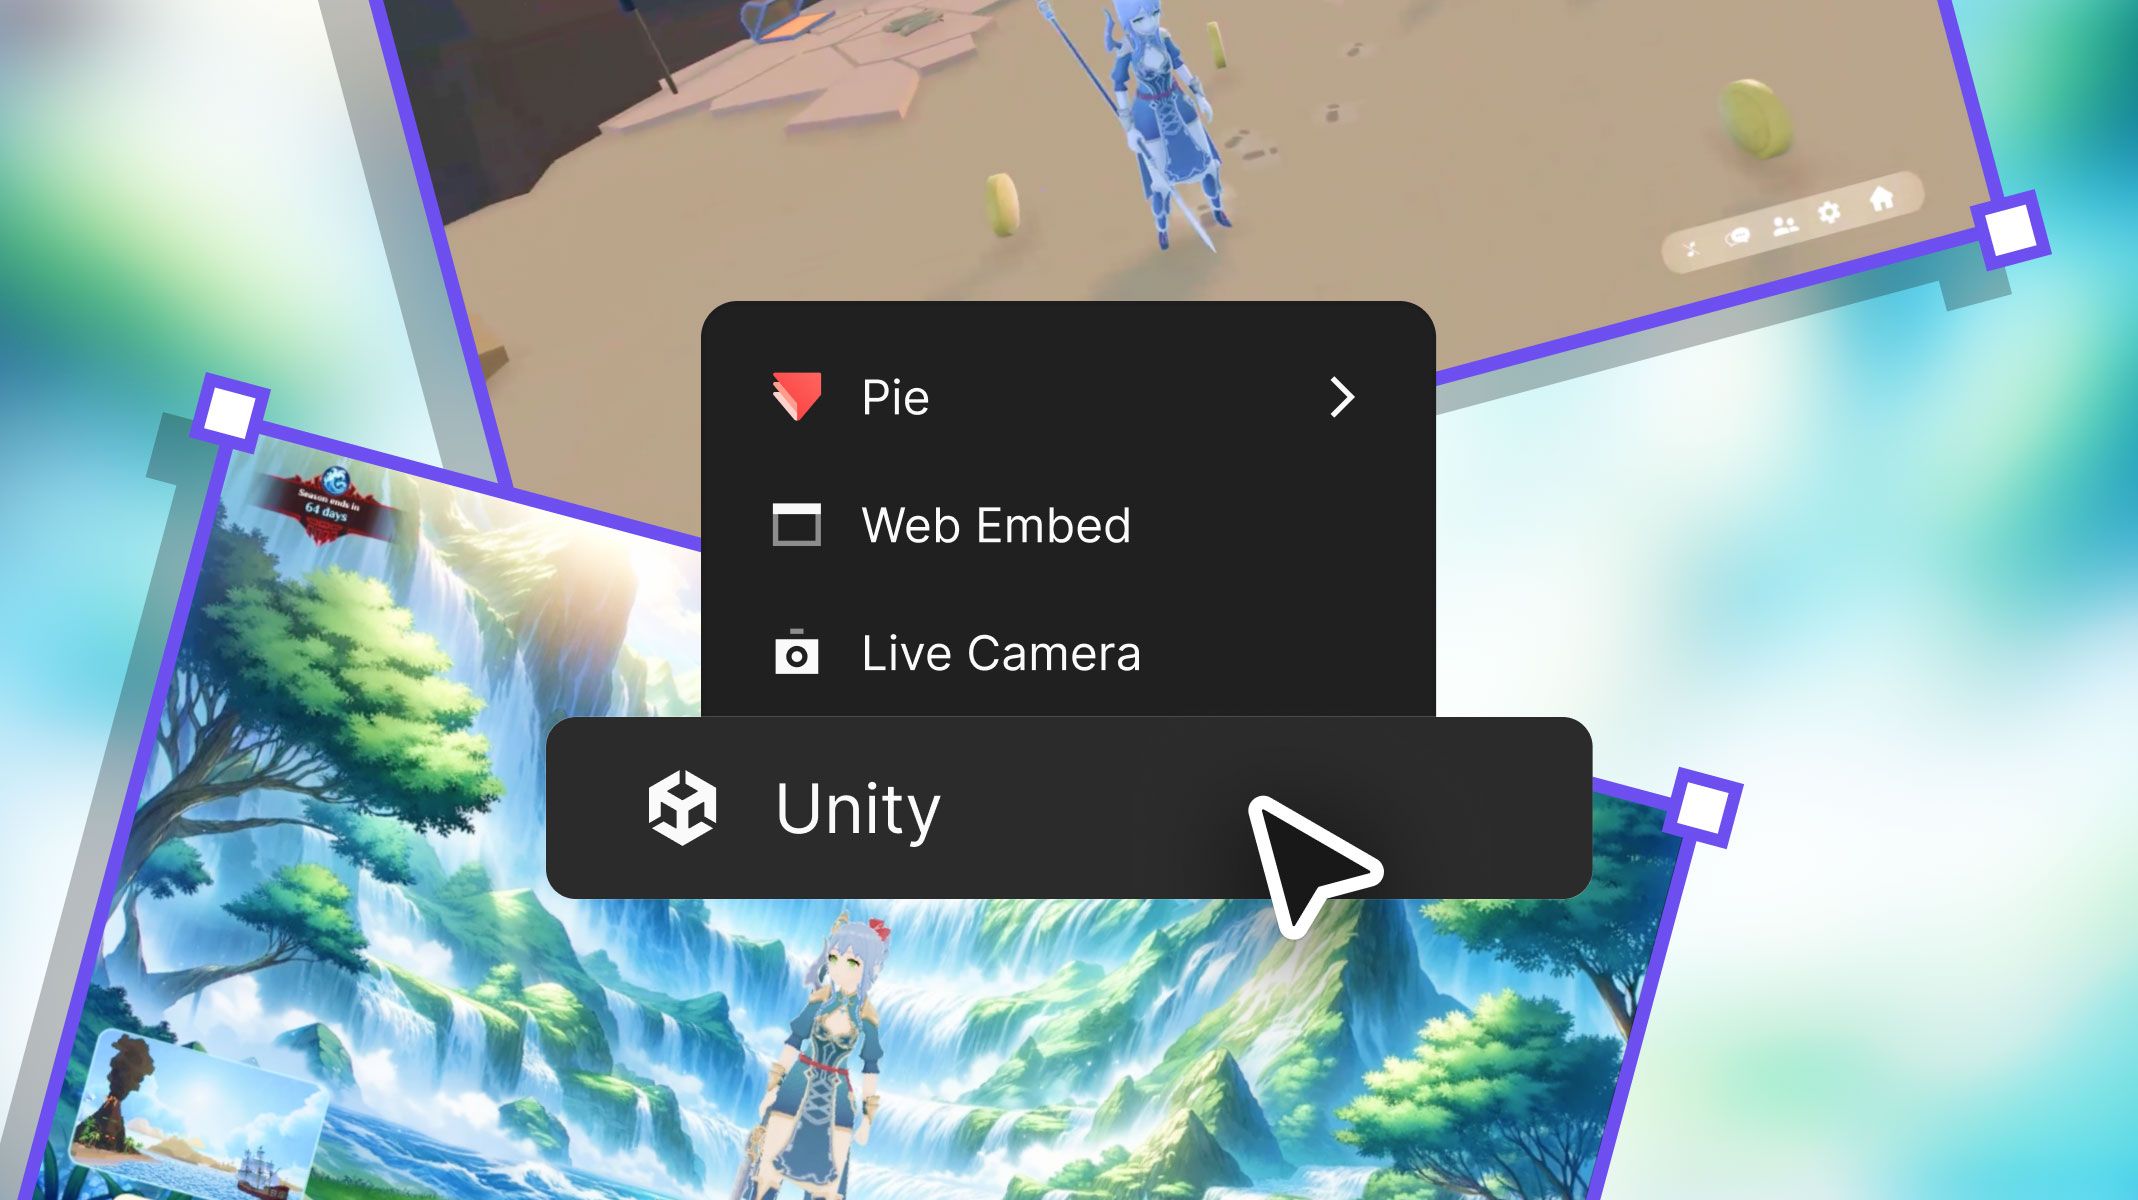
Overview
- Configure the ProtoPie prototype
- Set up the Unity project
- Set up the ProtoPie Unity plugin
- Prepare the scene manager script
- Set up the Unity to ProtoPie communication
- Build the Unity project & import it into ProtoPie
- Preview and test in ProtoPie Connect
This step-by-step tutorial will guide you through creating a game UI demo using ProtoPie Connect and the Unity plugin. We'll cover importing files, setting up interactions, and integrating Unity with ProtoPie for a seamless game experience.
To follow along with the tutorial, watch the demo from minute 26:38.
Before diving into the tutorial, let's preview the final demo to understand what we aim to achieve.
This demo showcases a basic MMO RPG interface with UI elements created in ProtoPie. Notice the various UI elements on the screen, such as tabs, enter, and functional buttons. The UI elements are built in ProtoPie and will be layered on top of the Unity game environment.

1. Configure the ProtoPie prototype
1.1 Download the Pie
Download and open this Pie file in ProtoPie Studio. It contains the UI elements and interactions we'll be using to control our Unity game.
1.2 Add UI elements
Next, we'll create the UI elements in ProtoPie. These elements will serve as the control interface for our Unity game, such as:
- UI elements: Create buttons, tabs, and other interactive components in ProtoPie.
- Layering: Ensure these UI elements will properly overlay the Unity project. This means they should be positioned and sized to fit within the game screen.
1.3 Configure ProtoPie to Unity messages
Next, we'll configure the specific messages that ProtoPie will send to Unity, such as:
- Enter button (Scene 01): Configure the enter button in ProtoPie to send a message to Unity. This message will trigger a scene change to the gameplay experience.
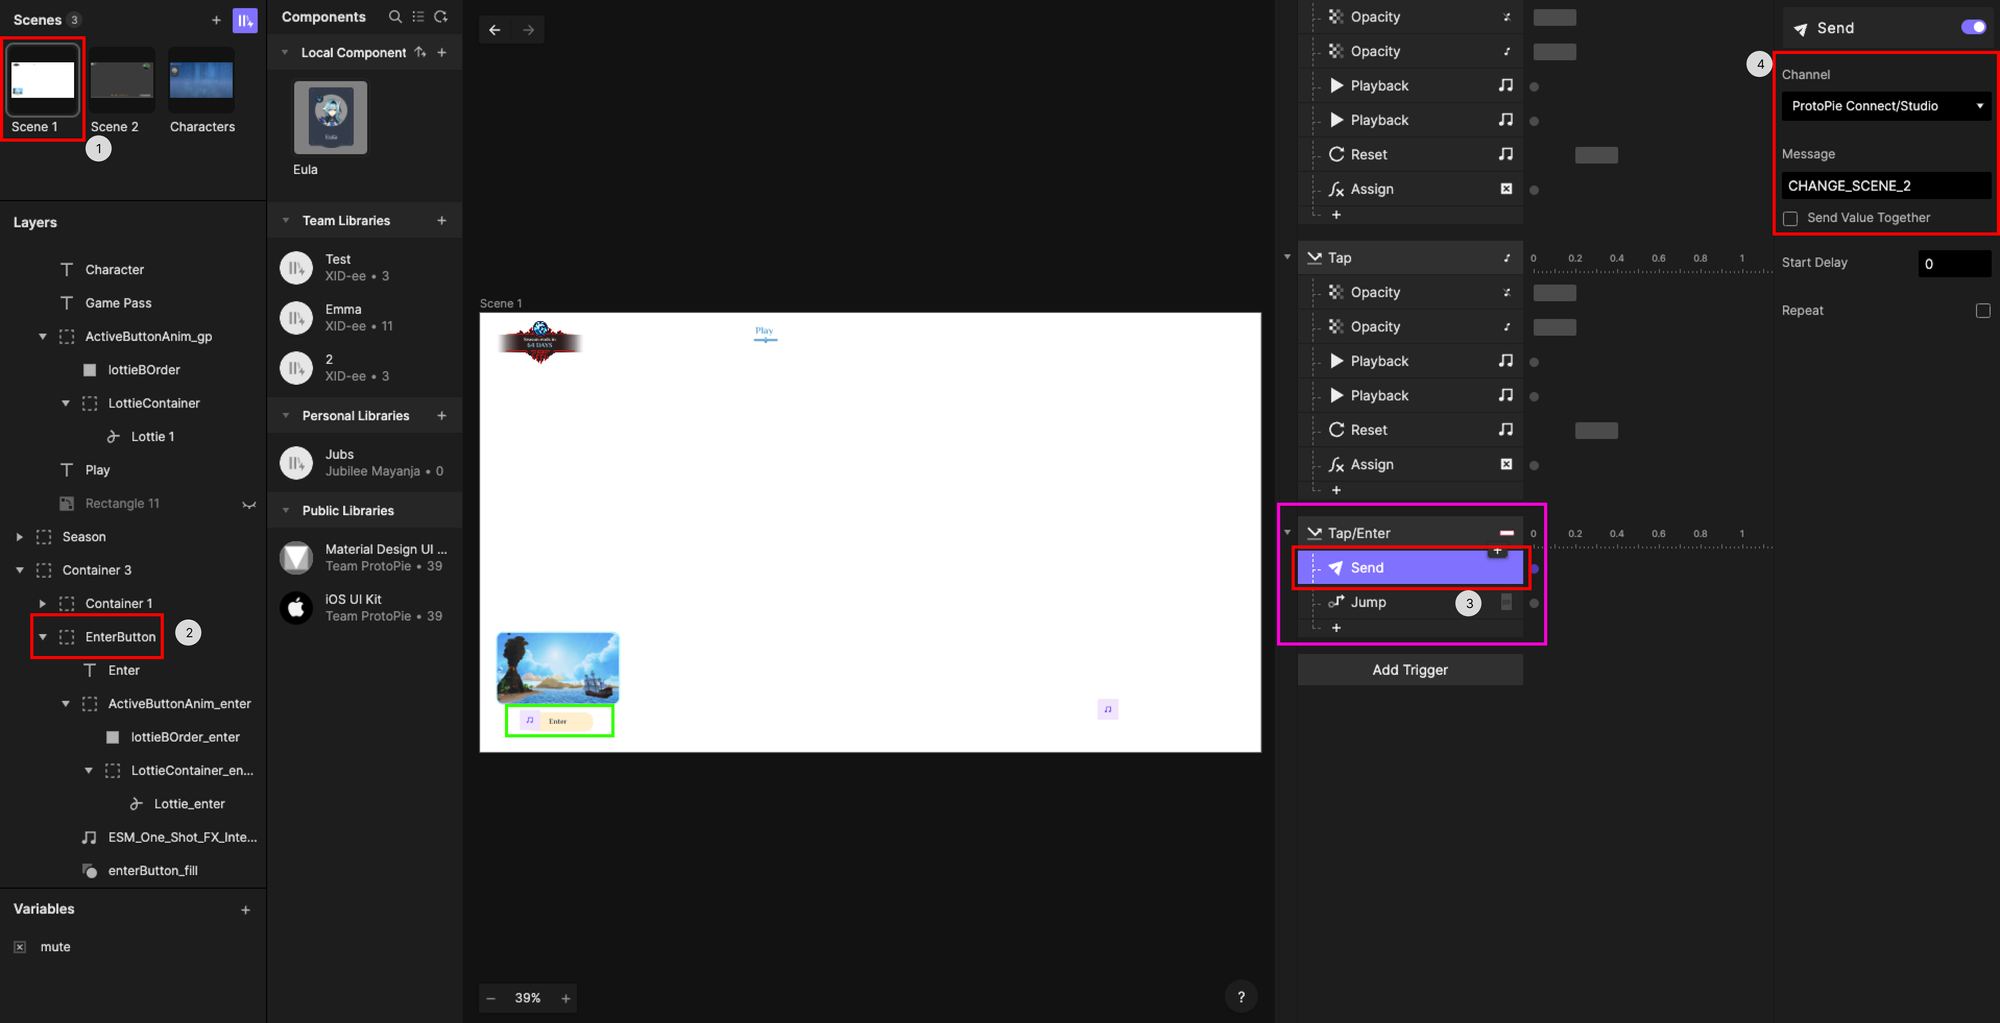
- Home button (Scene 02): Similarly, configure the home button to send a message to Unity. This message will revert the scene to the main menu

- Background opacity (Scene 02): Set the background opacity color to 0.

2. Set up the Unity project
2.1 Download the Unity Game UI template
- Download this Unity Game UI template and open it in Unity.
2.2 Prepare the Unity scene
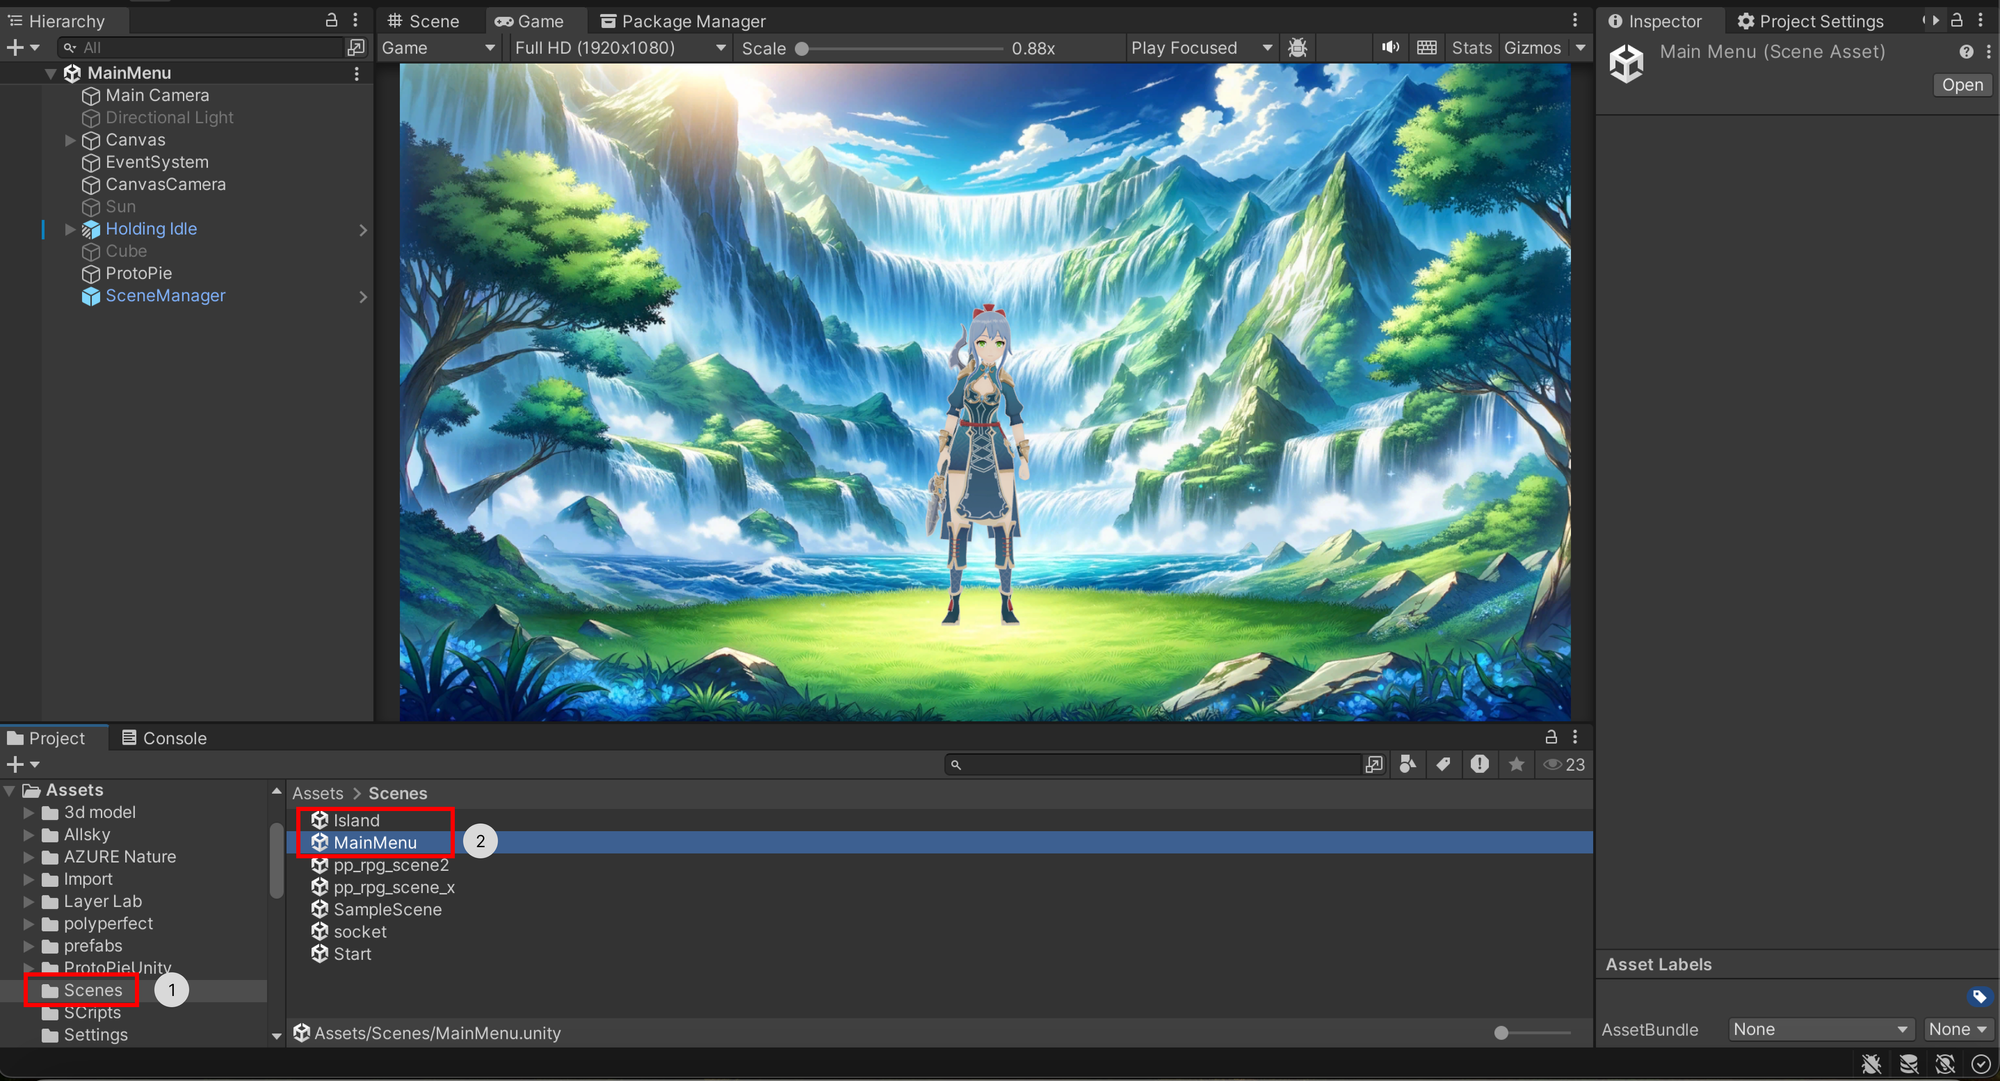
- The project includes two scenes: the Island scene and the MainMenu scene. These are located in the Assets→Scenes folder. We will start with the MainMenu scene and then repeat the process for the Island scene.
3. Set up the ProtoPie Unity plugin
- The scene should already include a game object called "ProtoPie," which contains the necessary code scripts to set up communication with ProtoPie Connect.

- Further examination of the Mapping shows that the message direction will be "ProtoPie to Unity" with the message "CHANGE_SCENE_2.”
- You can edit the Mapping Table directly. Add/remove/edit Mappings from the table.

4. Prepare the scene manager script
Next, we'll write a script to manage scene transitions in Unity.
- Scene manager: Write a script (e.g.,
ChangeScene) that changes scenes in Unity. This script will be triggered by messages from ProtoPie. - Example: The script below contains a function
_ChangeScene()that, when called, will change the scene to whichever scene name has been included in thesceneNamepublic variable.

- Create a game object in the Unity scene and add the
ChangeScenescript. In this project, the game objectSceneManagerincludes this script. - The
sceneNamevariable is public, so you can change it to any other name as long as it matches the name of the scene you want to transition to.
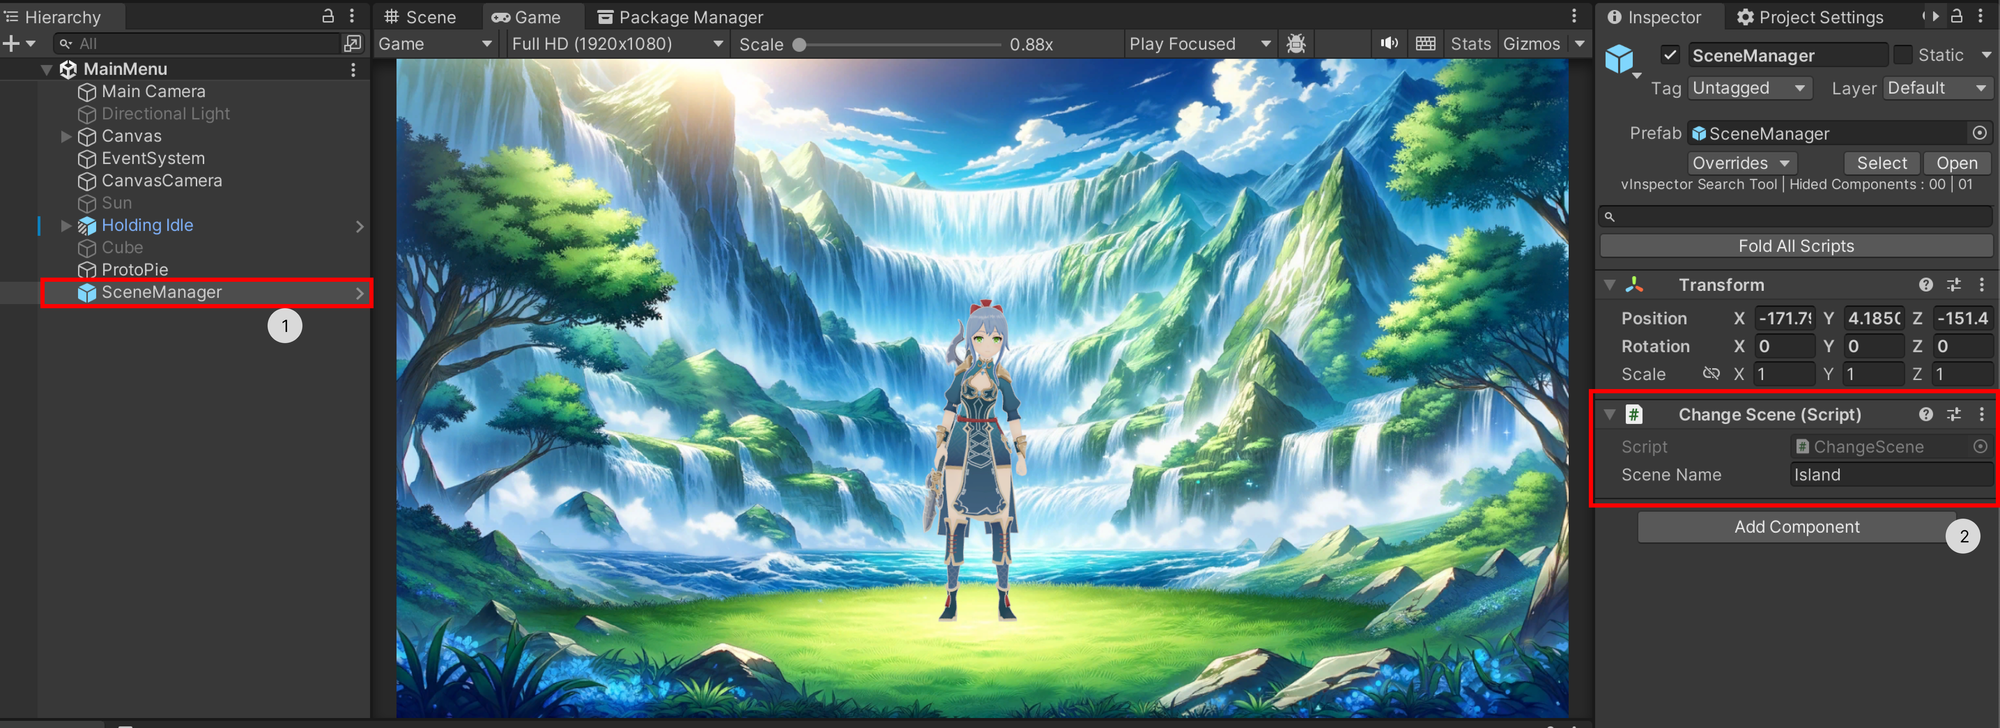
- To ensure that the function
_ChangeSceneis called when Unity receives theCHANGE_SCENE_2message from ProtoPie, add theSceneManagergame object to the mapping under "Desired action" via drag and drop.
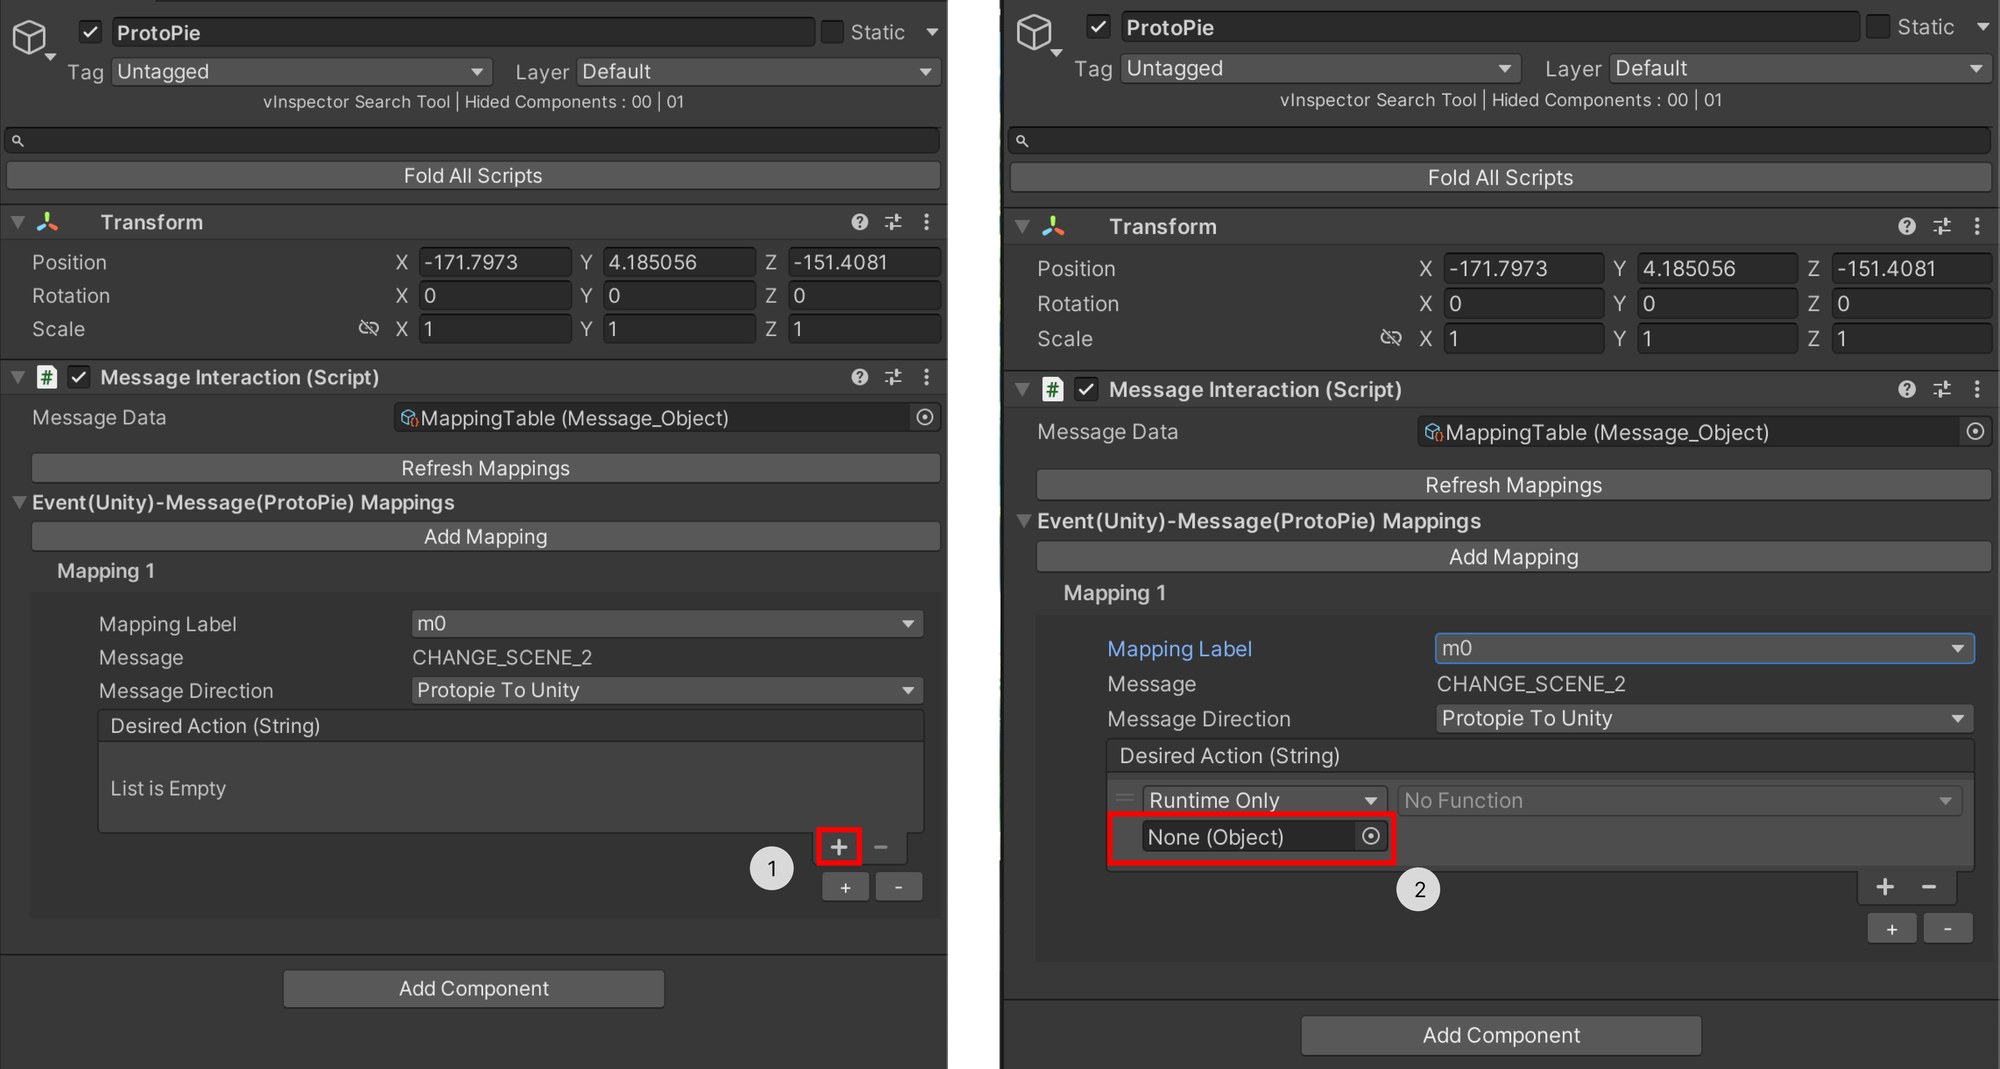
- Find the function “_ChangeScene” from the dropdown menu list.
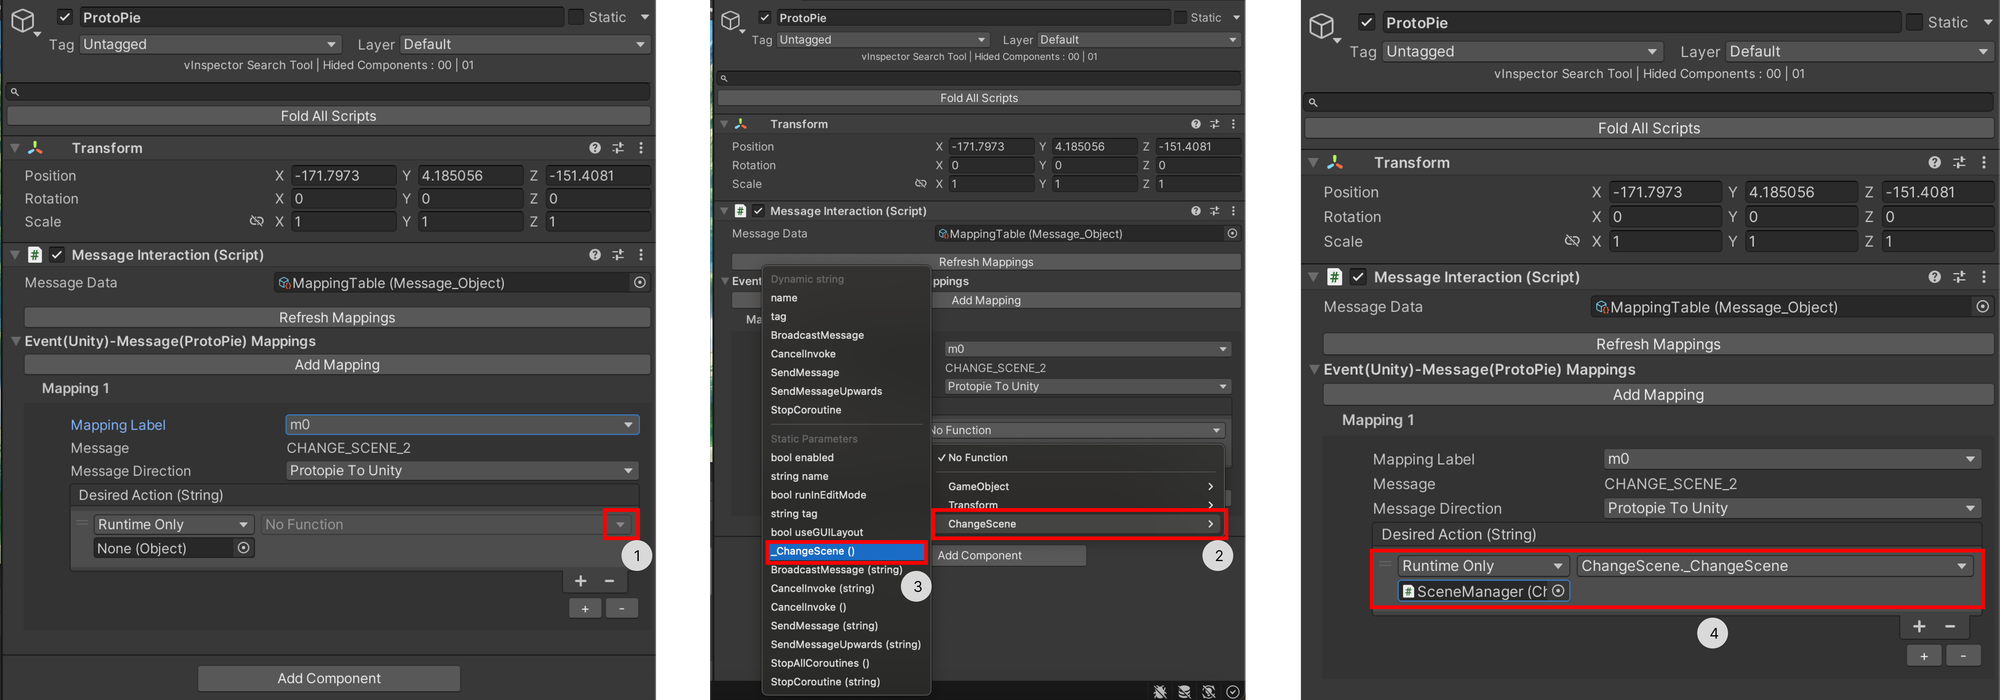
- Repeat this same process for the Island scene.
- Create a
SceneManagerobject, add theChangeScenescript, and set the scene name to the scene you want to transition to; in this case, "MainMenu."
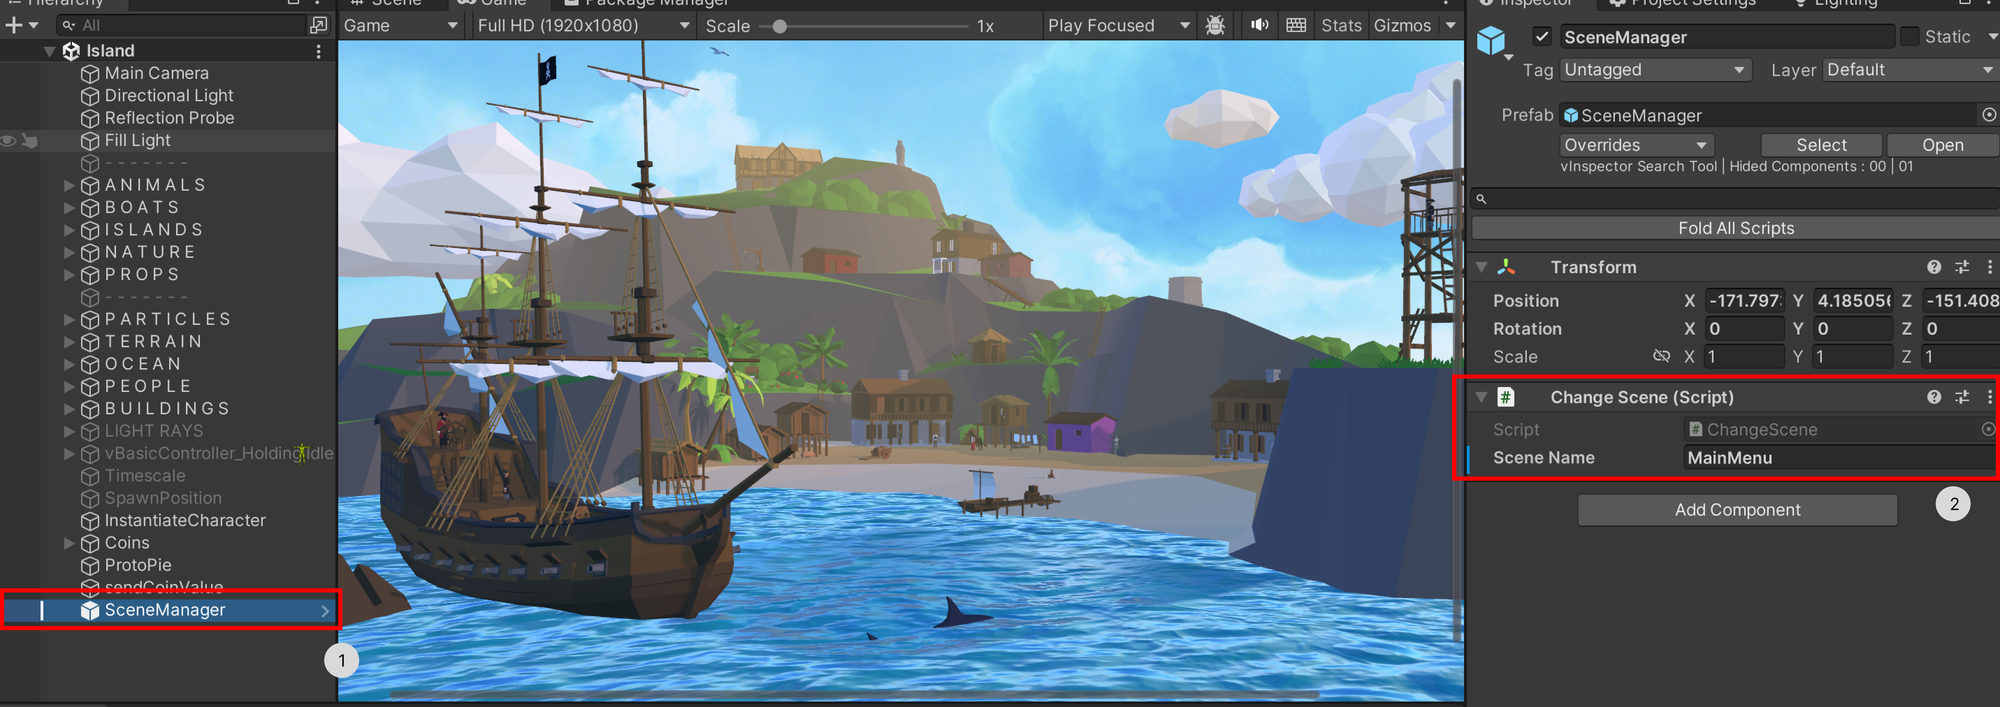
- Create a new mapping with the message
CHANGE_TO_SCENE_1and set the direction from ProtoPie to Unity.
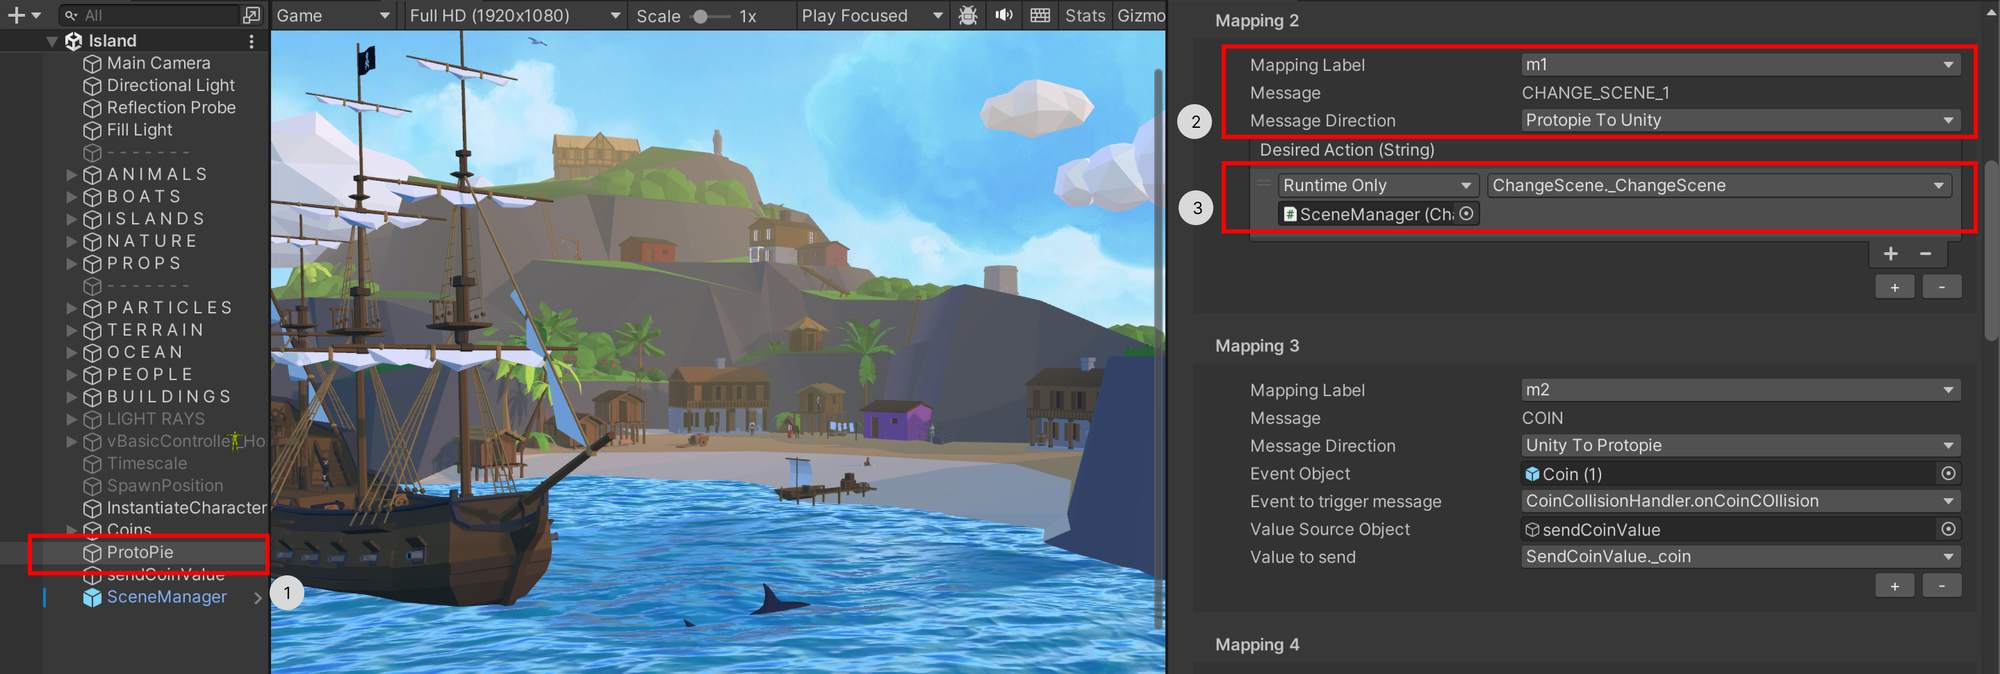
5. Set up the Unity to ProtoPie communication
5.1 Set up Unity to ProtoPie messages
Next, we'll configure Unity to send messages back to ProtoPie. This allows Unity game actions to trigger responses in ProtoPie.
- Example: When a game character collects a coin, Unity will send a message to ProtoPie to update the UI with the new coin count.
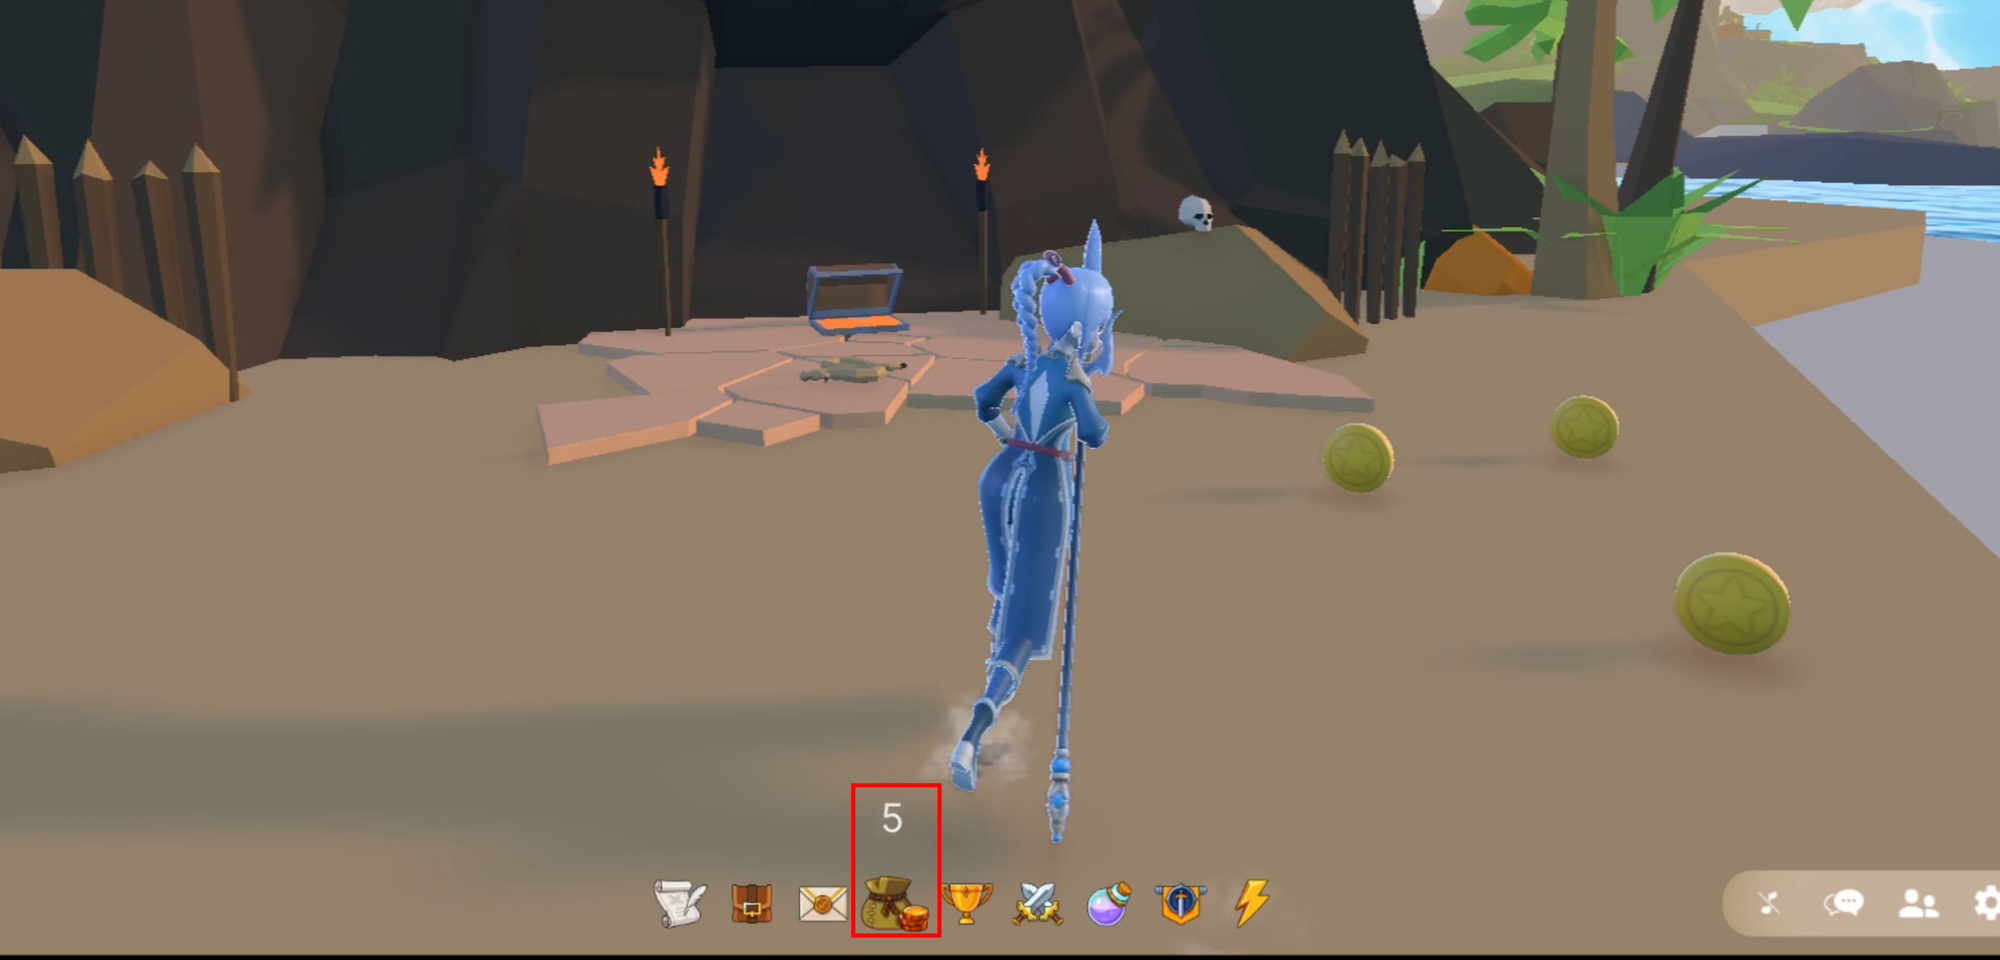
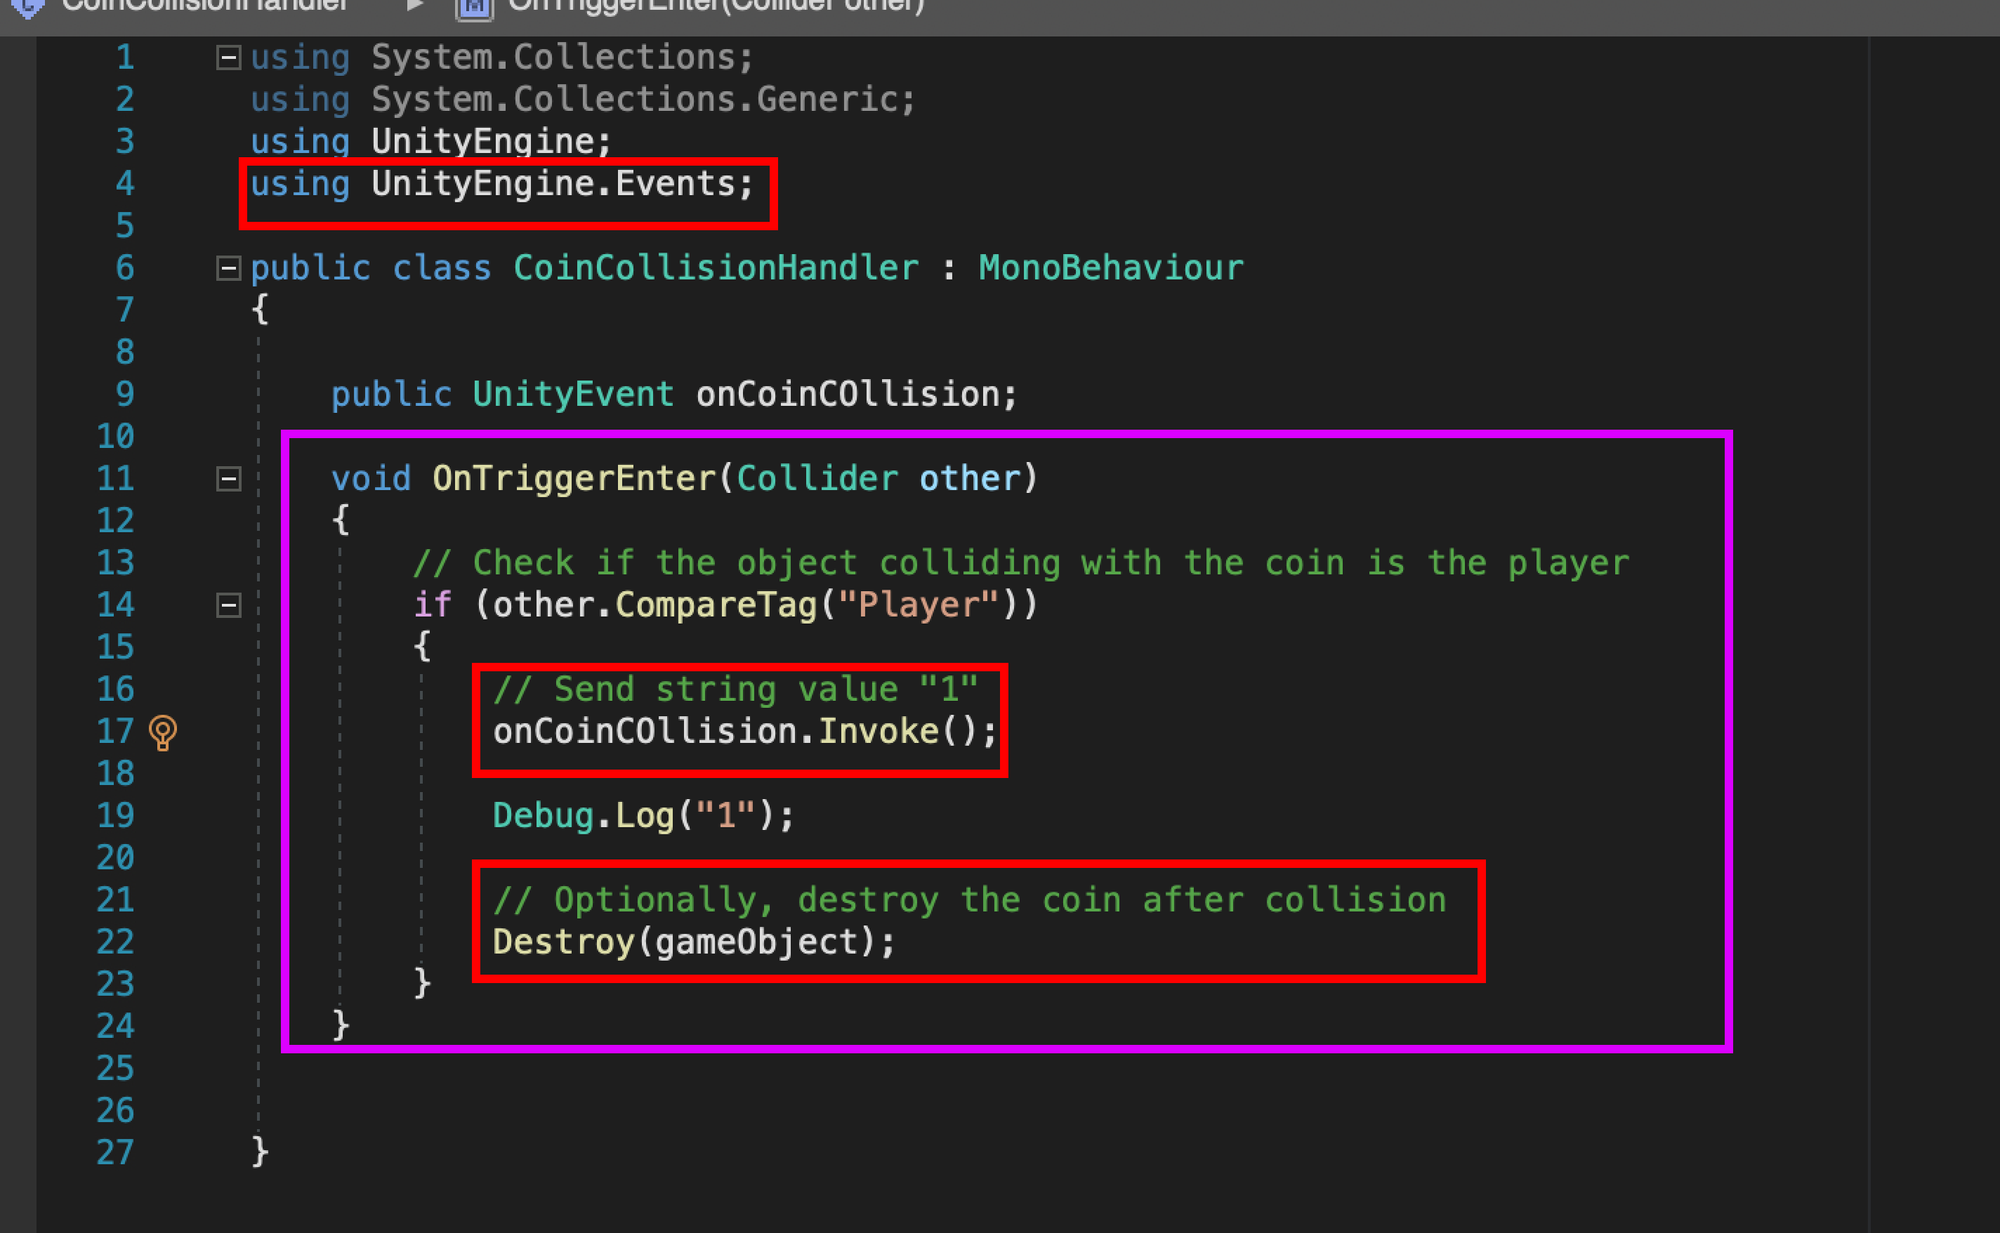
- To trigger sending messages from Unity to ProtoPie, a Unity event must be invoked.
- Write a script to invoke the Unity event
onCoinCollision.Invoke()when the player collides with the coin. The script should also include code to destroy the coin after the collision. This way, when the player collides with the coin, the event will be invoked, and the coin will disappear.
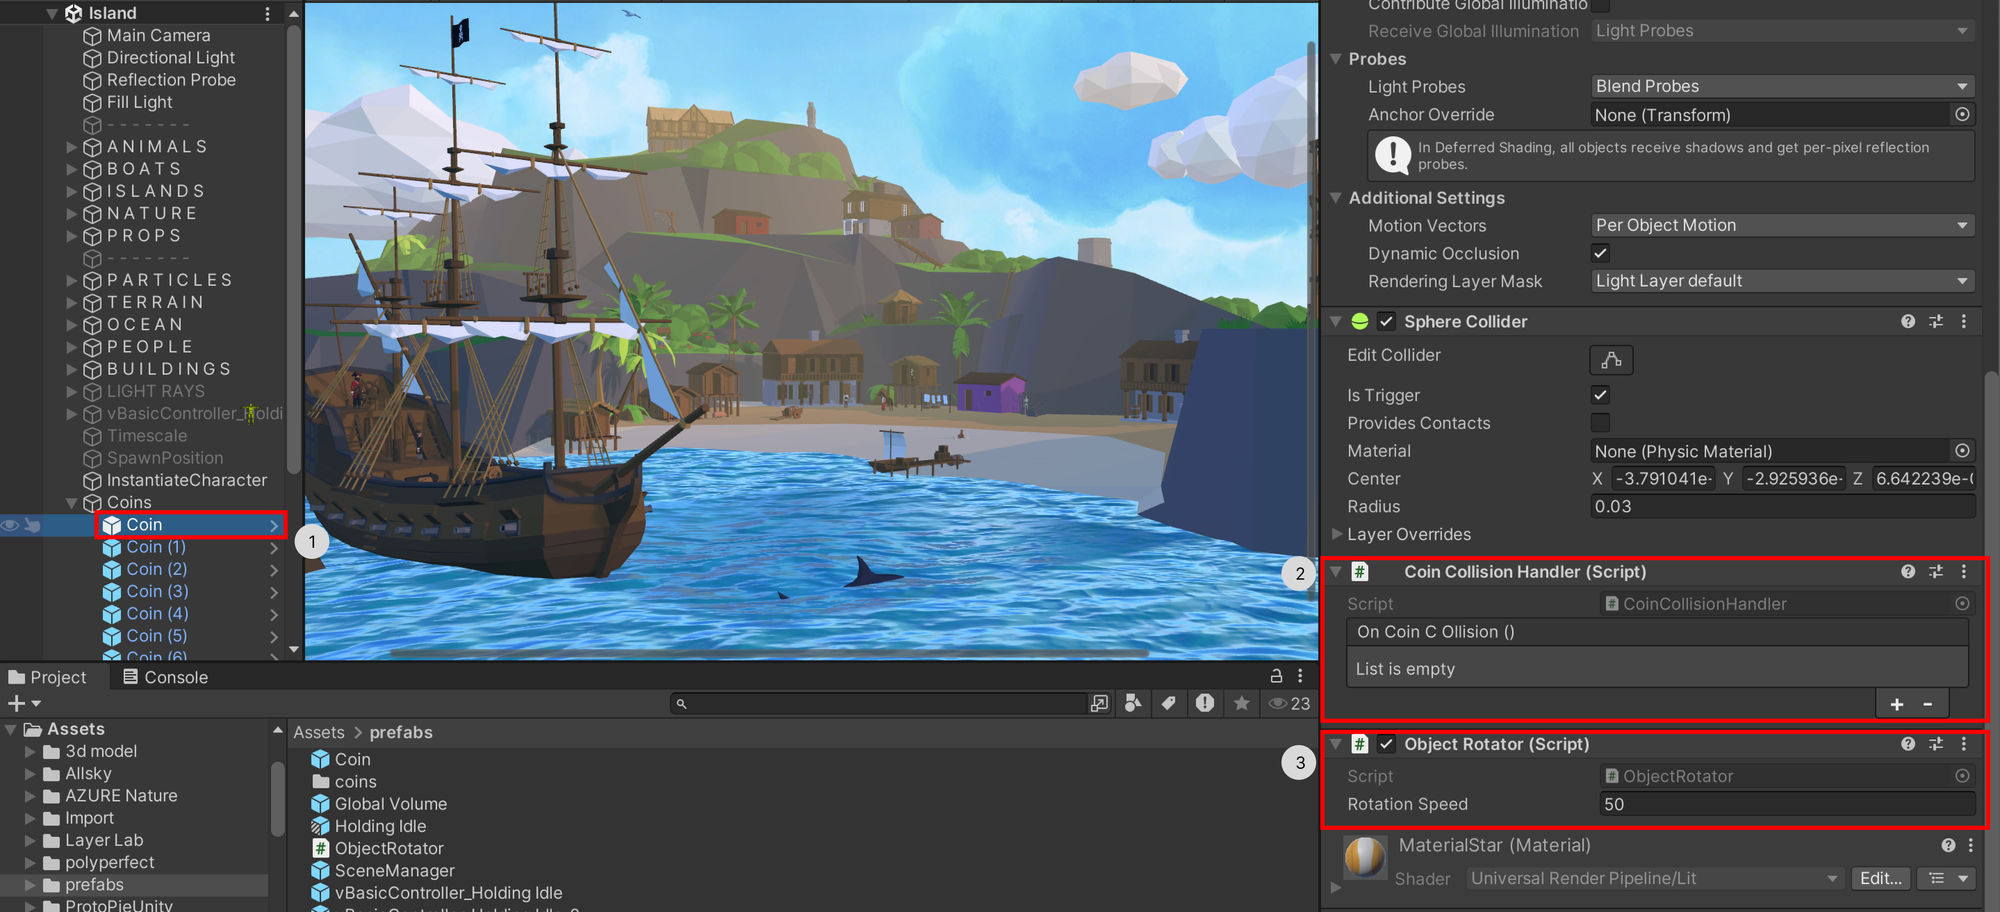
- In addition, you can add a script to rotate the coin.

- Attach both scripts to a
Coingame object.
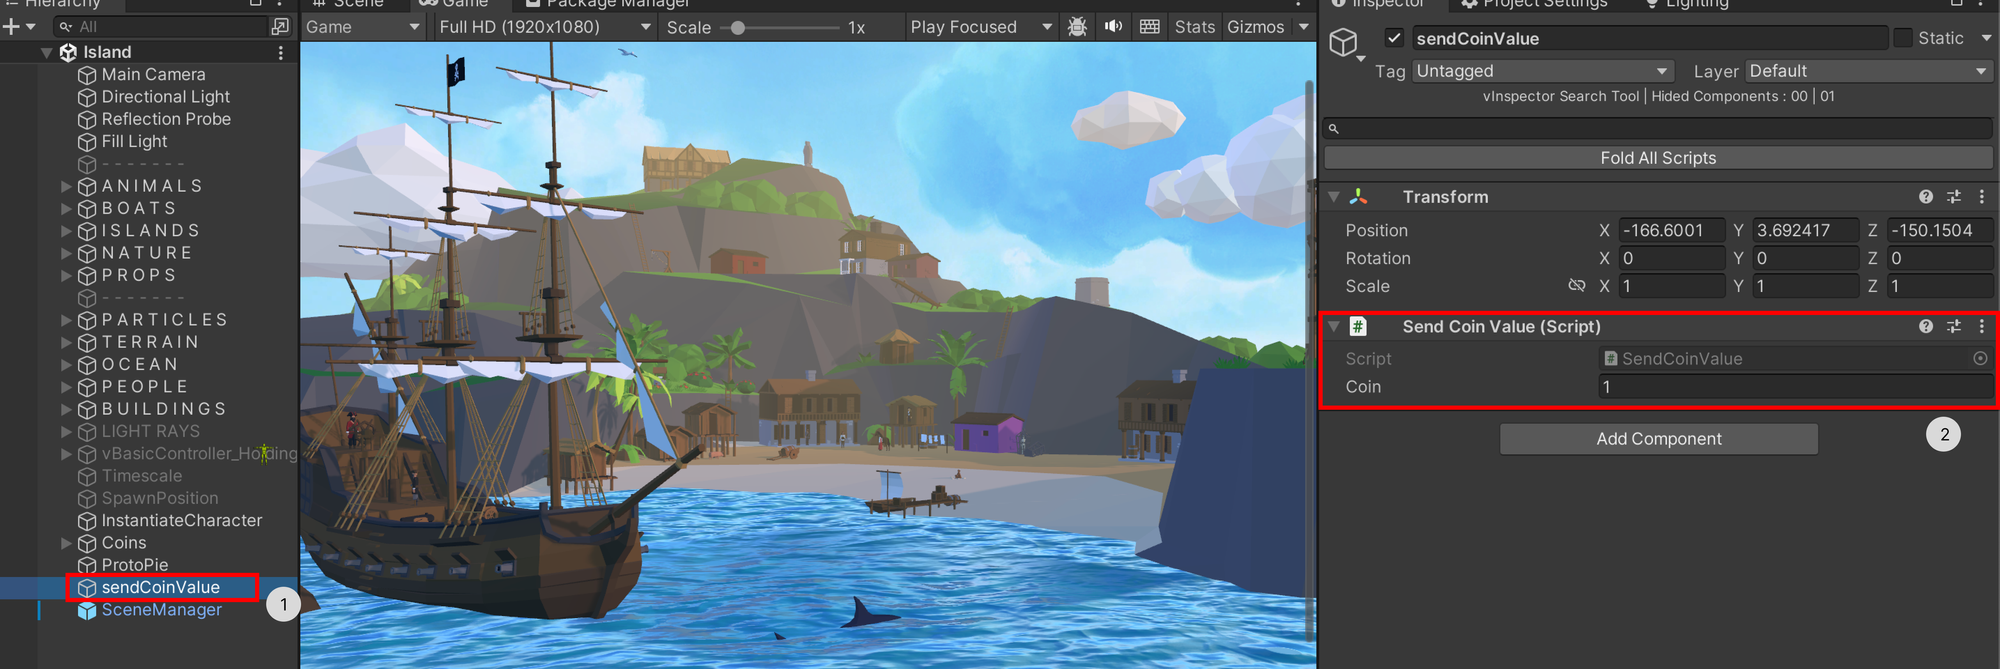
- The last script required is to send coin value when the message is sent. Write a script with a coin value. The variable should be a string.
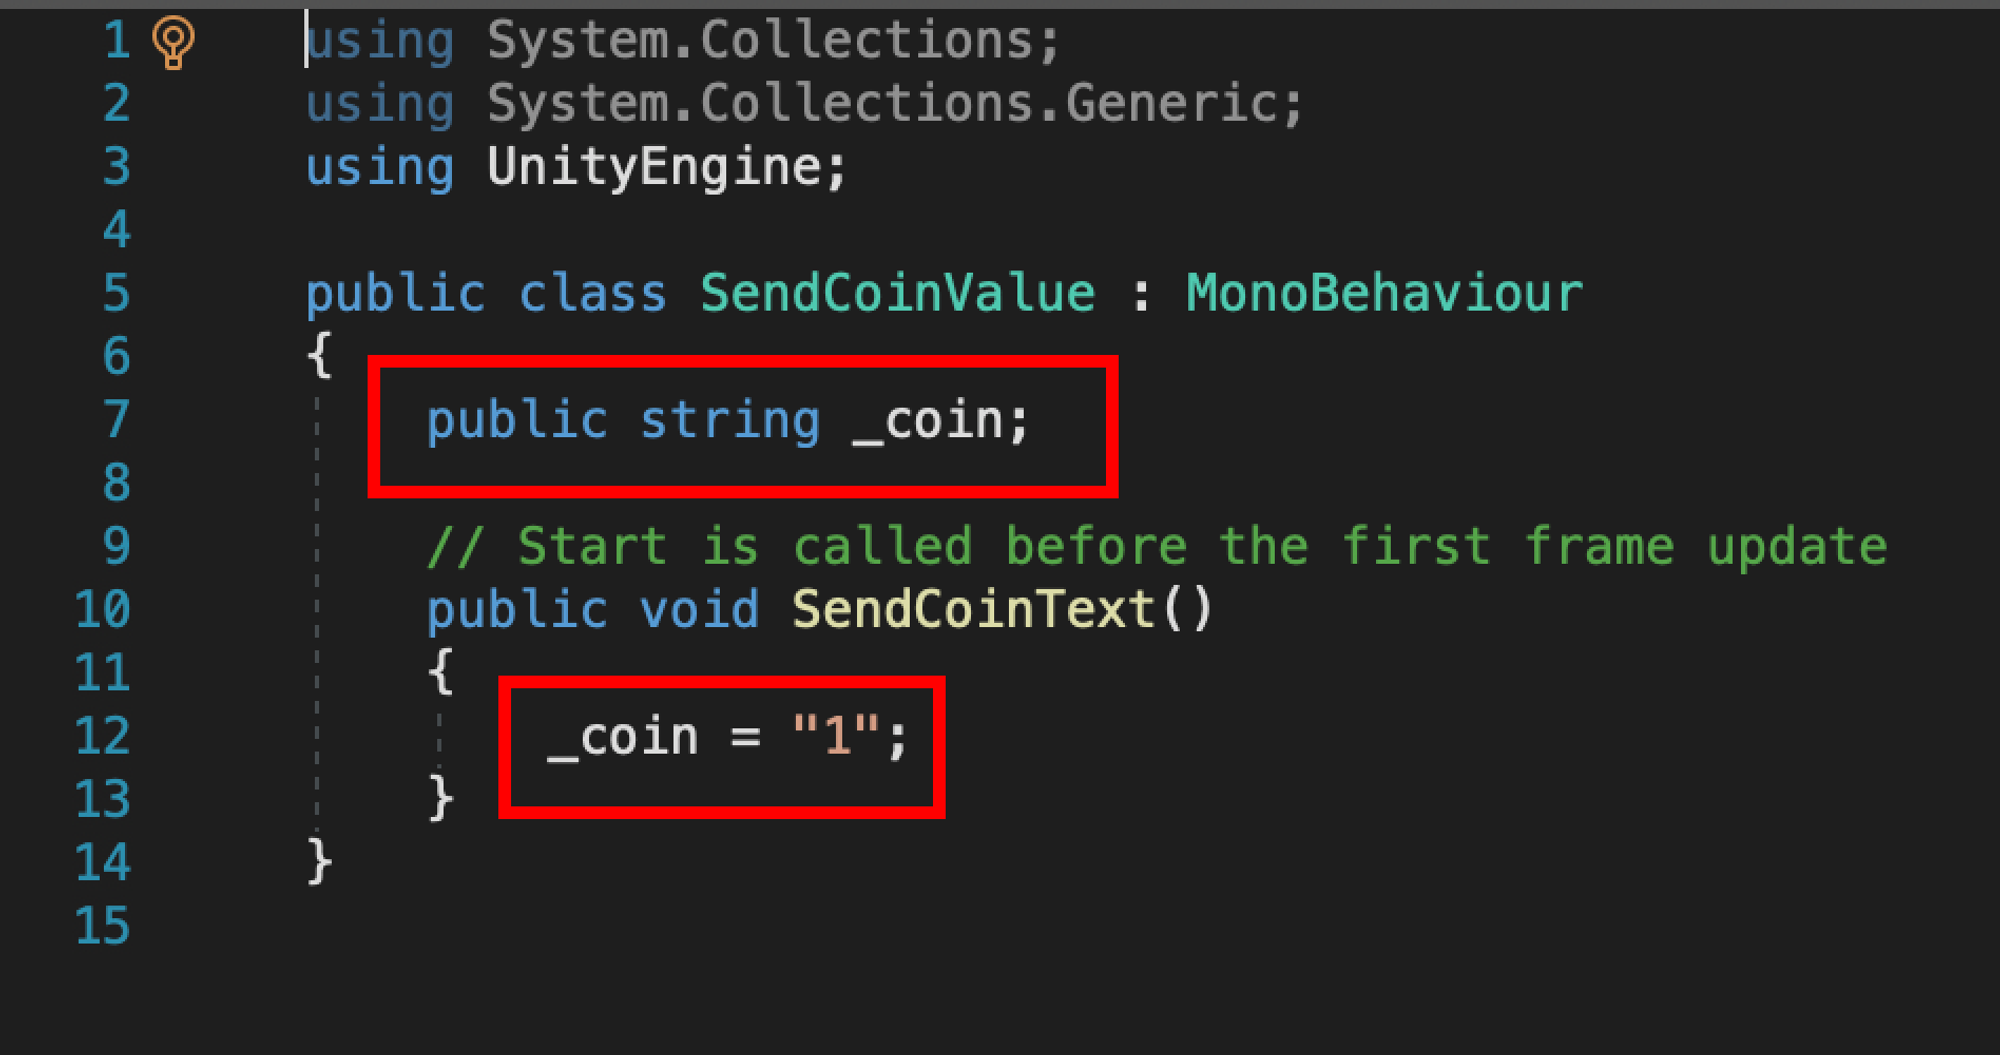
- Attach the script to a new Game object called
sendCoinValue.
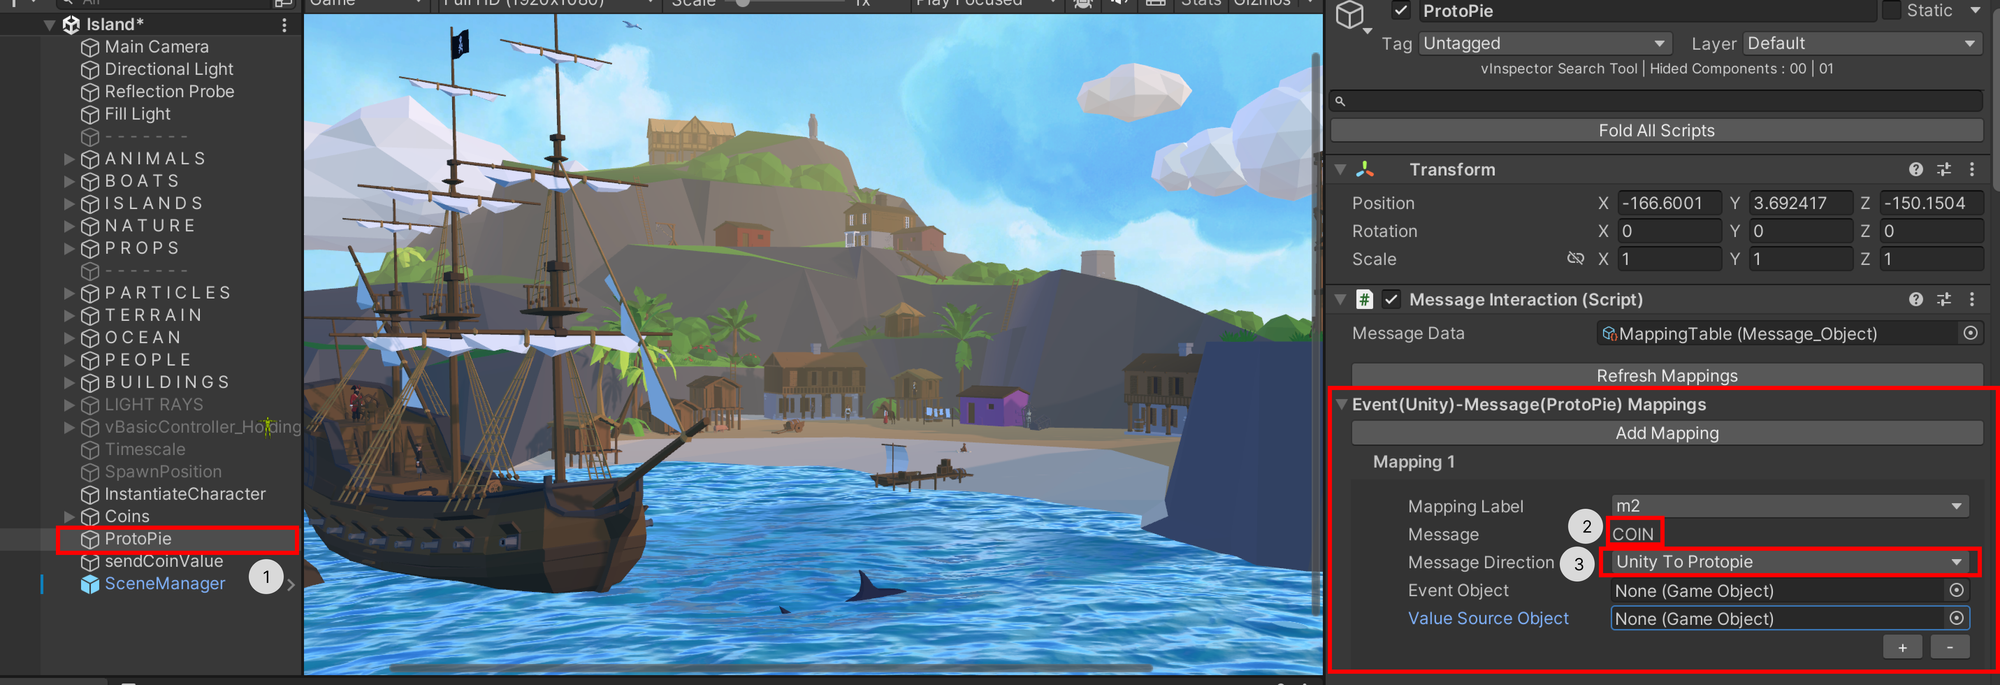
- Create a mapping for each coin in the scene in the ProtoPie game object. The mapping should have the message
COIN, as this is the message that Unity will send to ProtoPie. Set the direction to Unity to ProtoPie.
- Drag the
Coingame object into the Event Object slot. The script will automatically find the invoke code.

- Drag the
sendCoinValuegame object into the value source object slot. The script will automatically find the string variable.
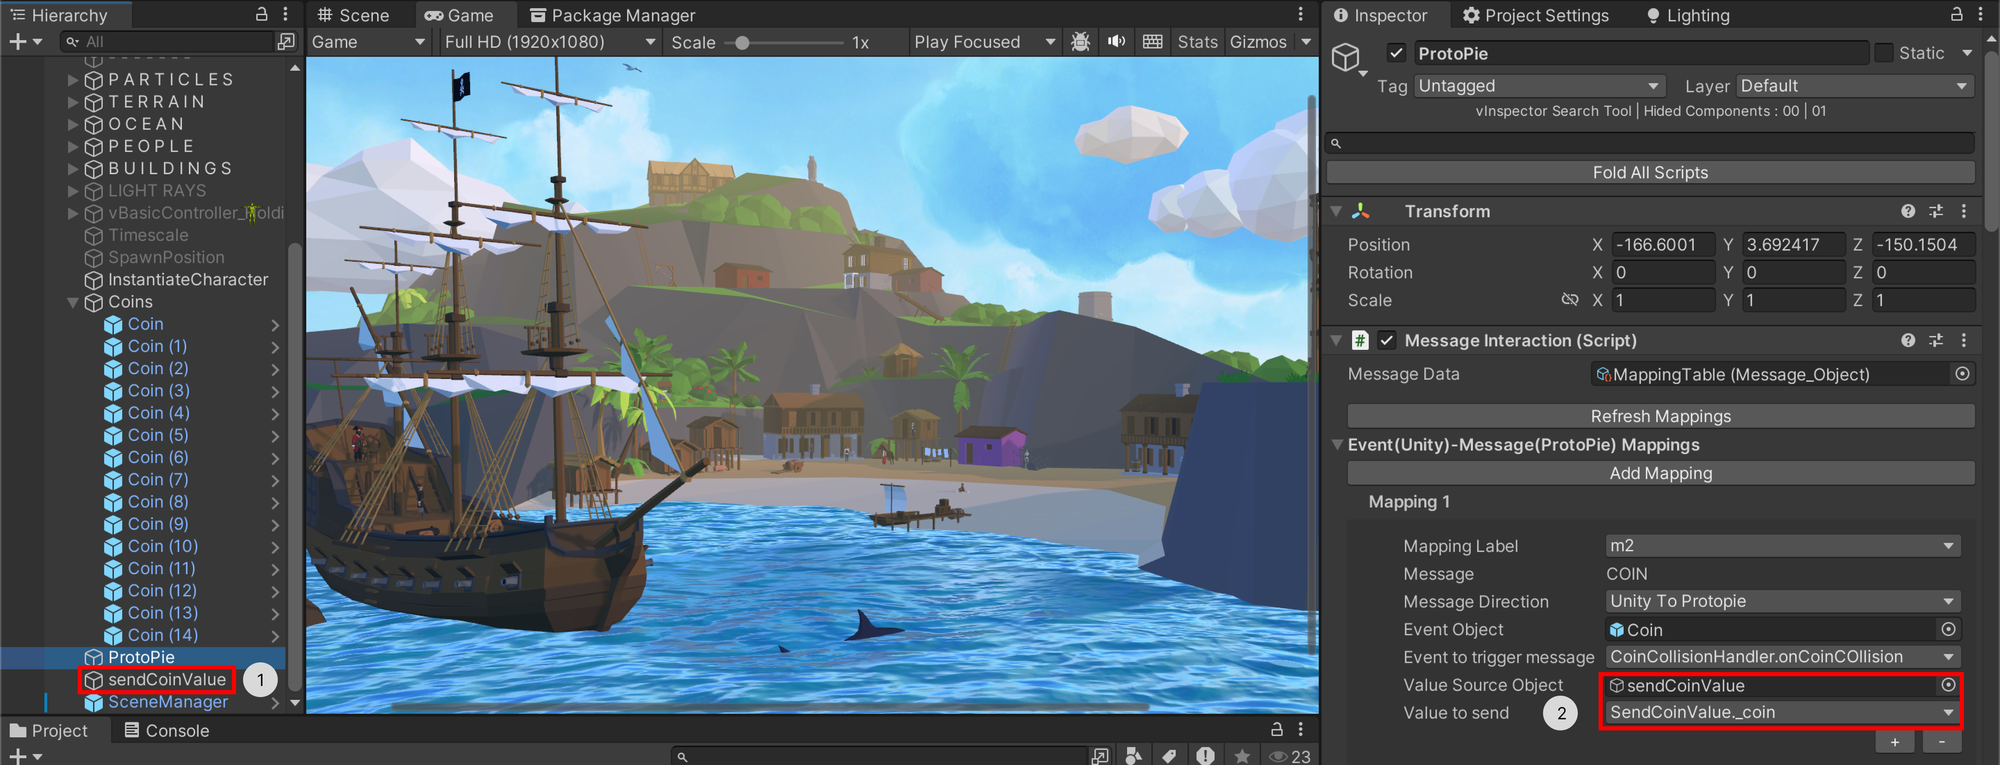
- Do this for the rest of the coins in the scene. Add each coin to its own mapping.
5.2 Set up the ProtoPie responses
We'll configure ProtoPie to respond to messages from Unity.
- Message handling: In ProtoPie, set up responses to incoming messages from Unity. For instance, receiving a "coin" message will increment the coin count, play a sound effect, and animate the coin icon.

6. Build the Unity project & import it into ProtoPie
6.1 Build the Unity project
After configuring the interactions, we'll build the Unity project as a WebGL application.
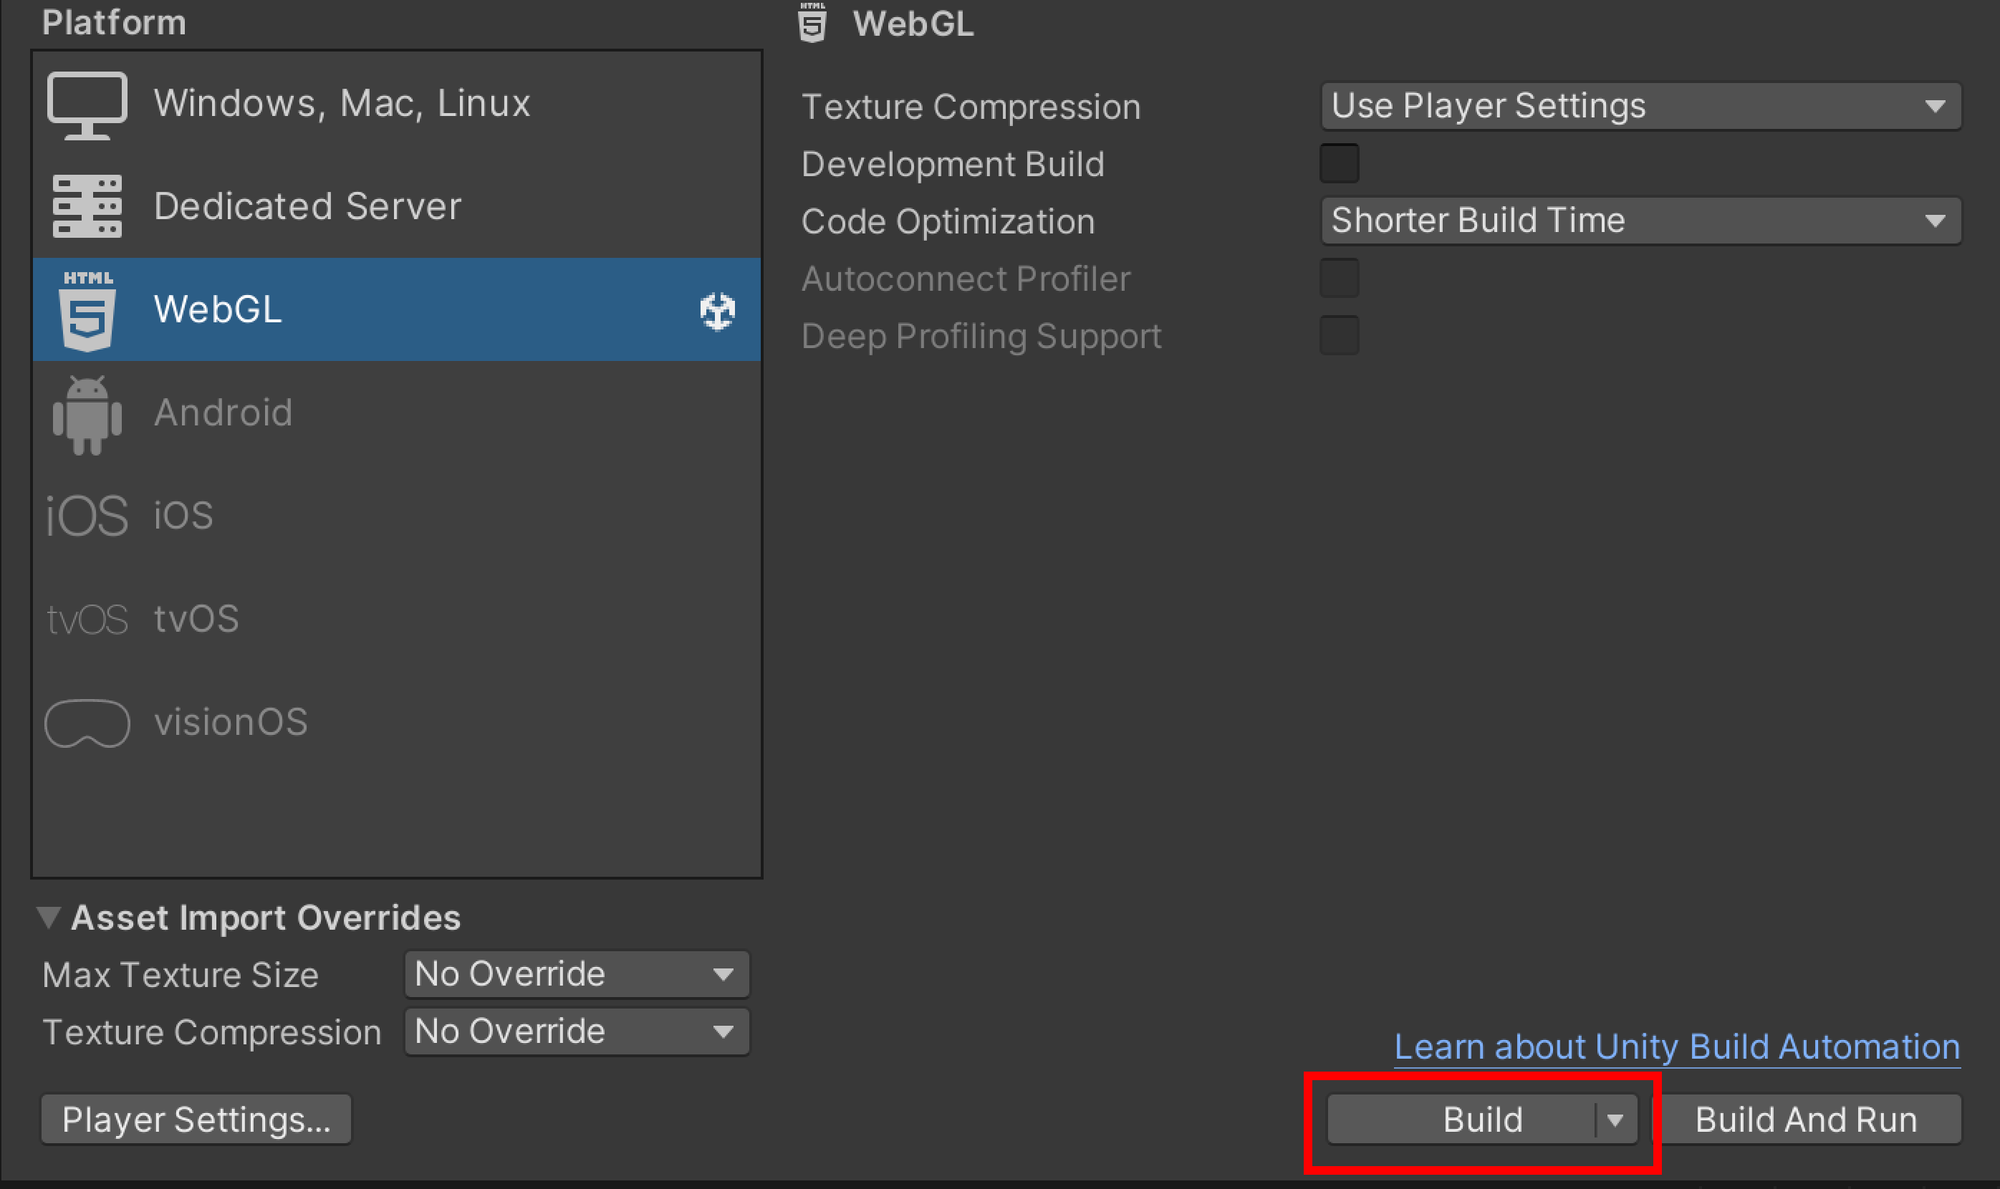
- Go to File → Build Settings. Make sure that all scenes are included and the platform is set to WebGL.
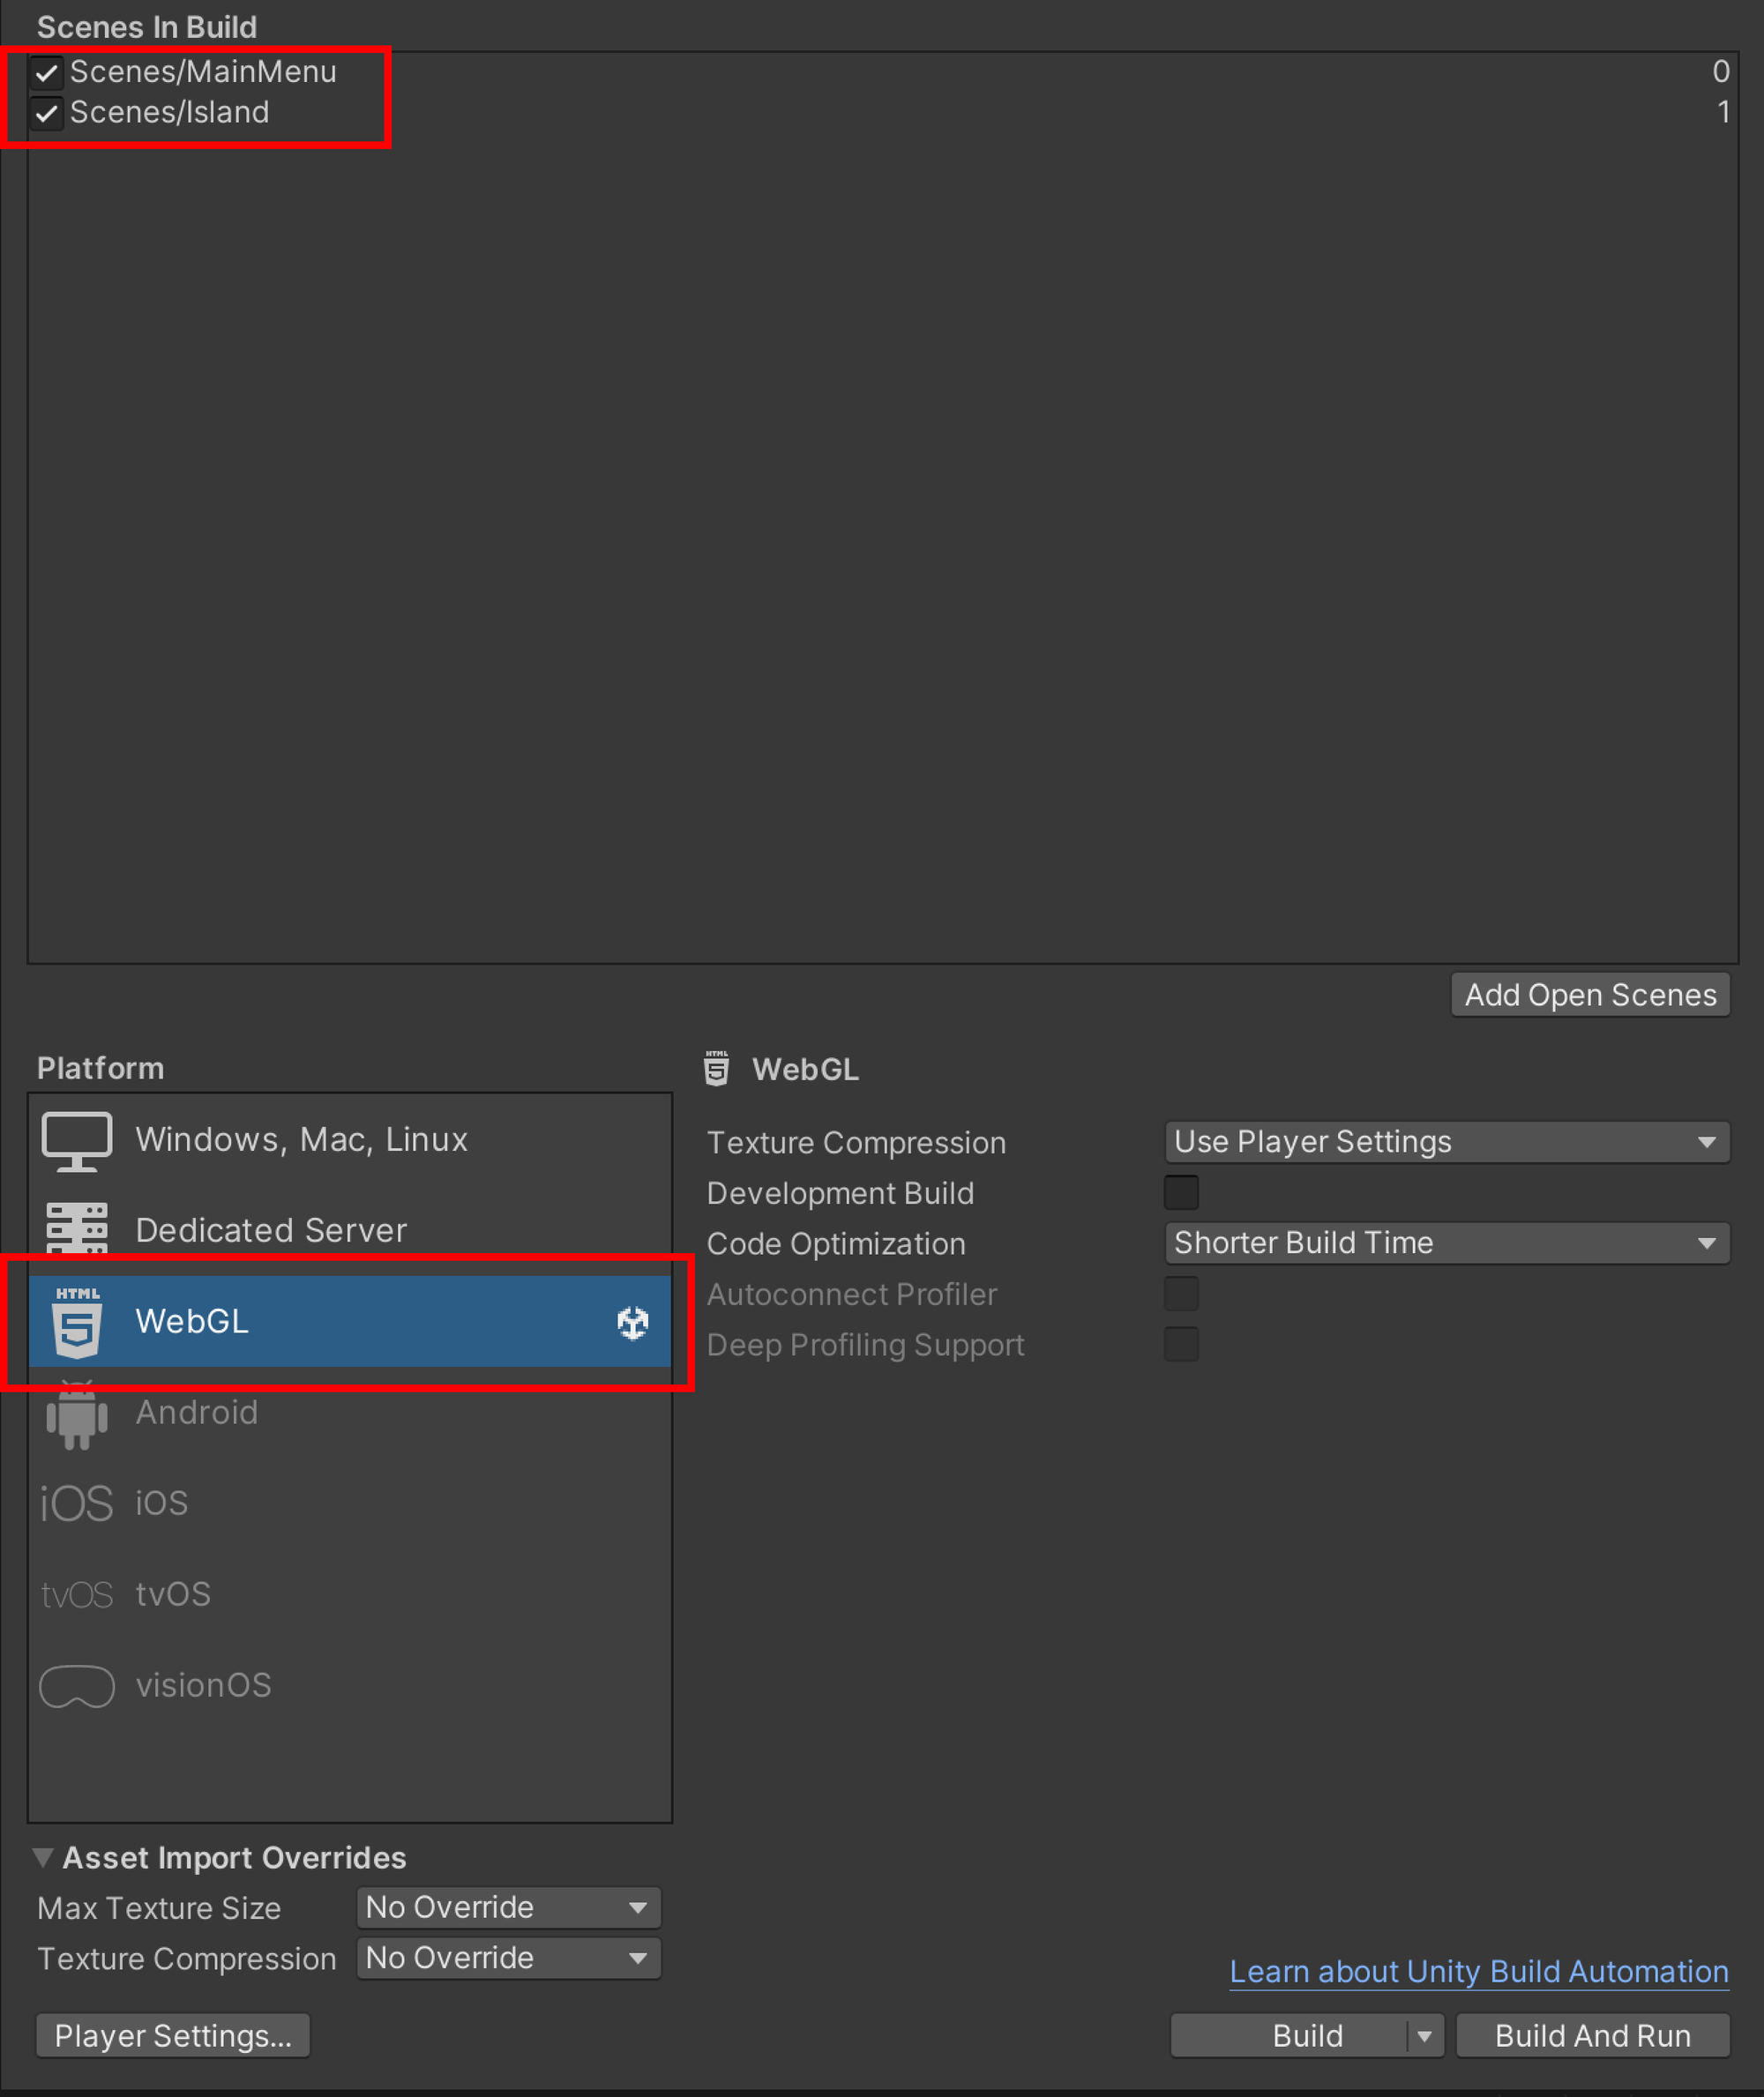
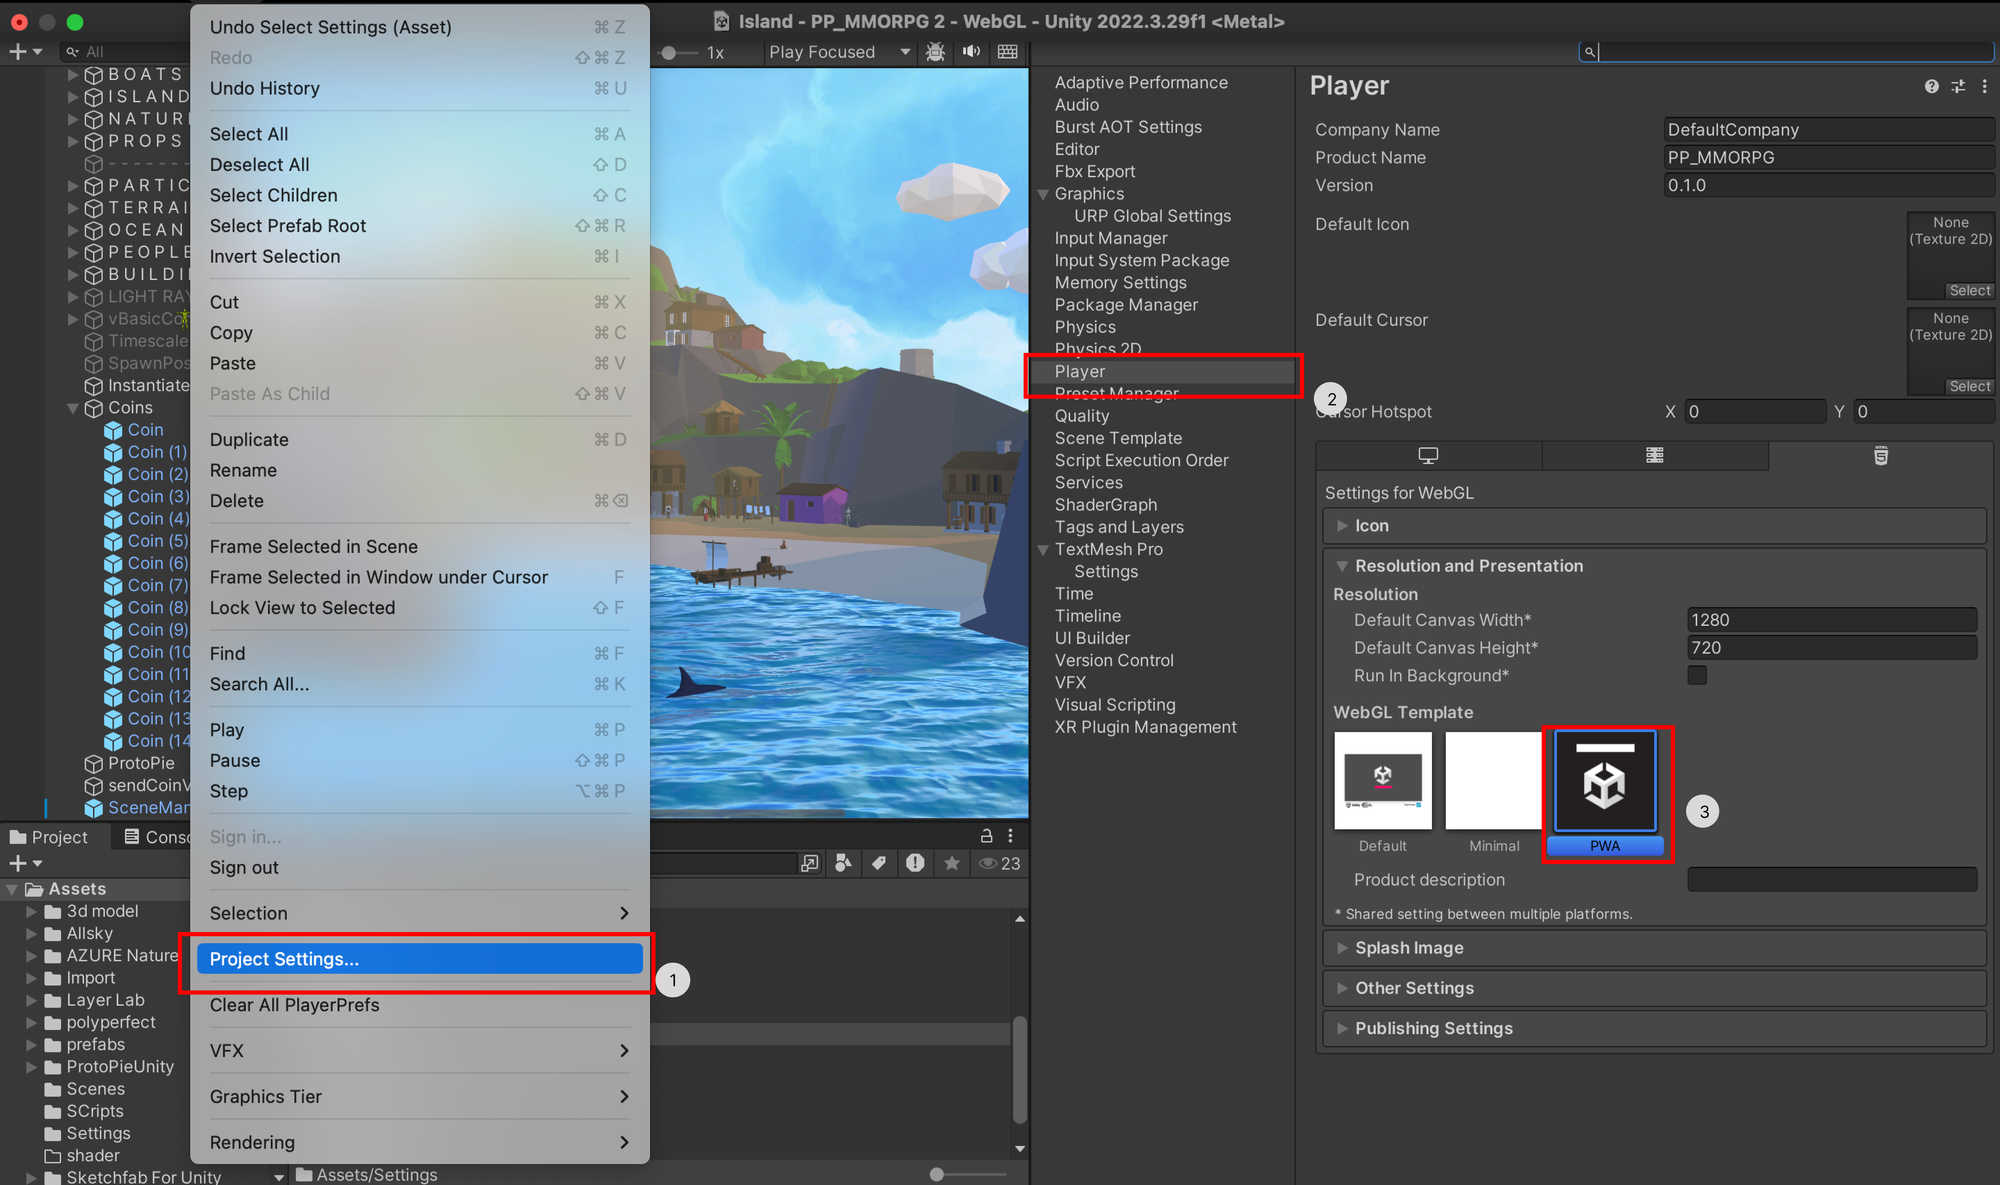
- Before building the project, a few changes need to be made in the Player settings. Go to Edit → Project Settings → Player.
- Set the WebGL template to PWA.
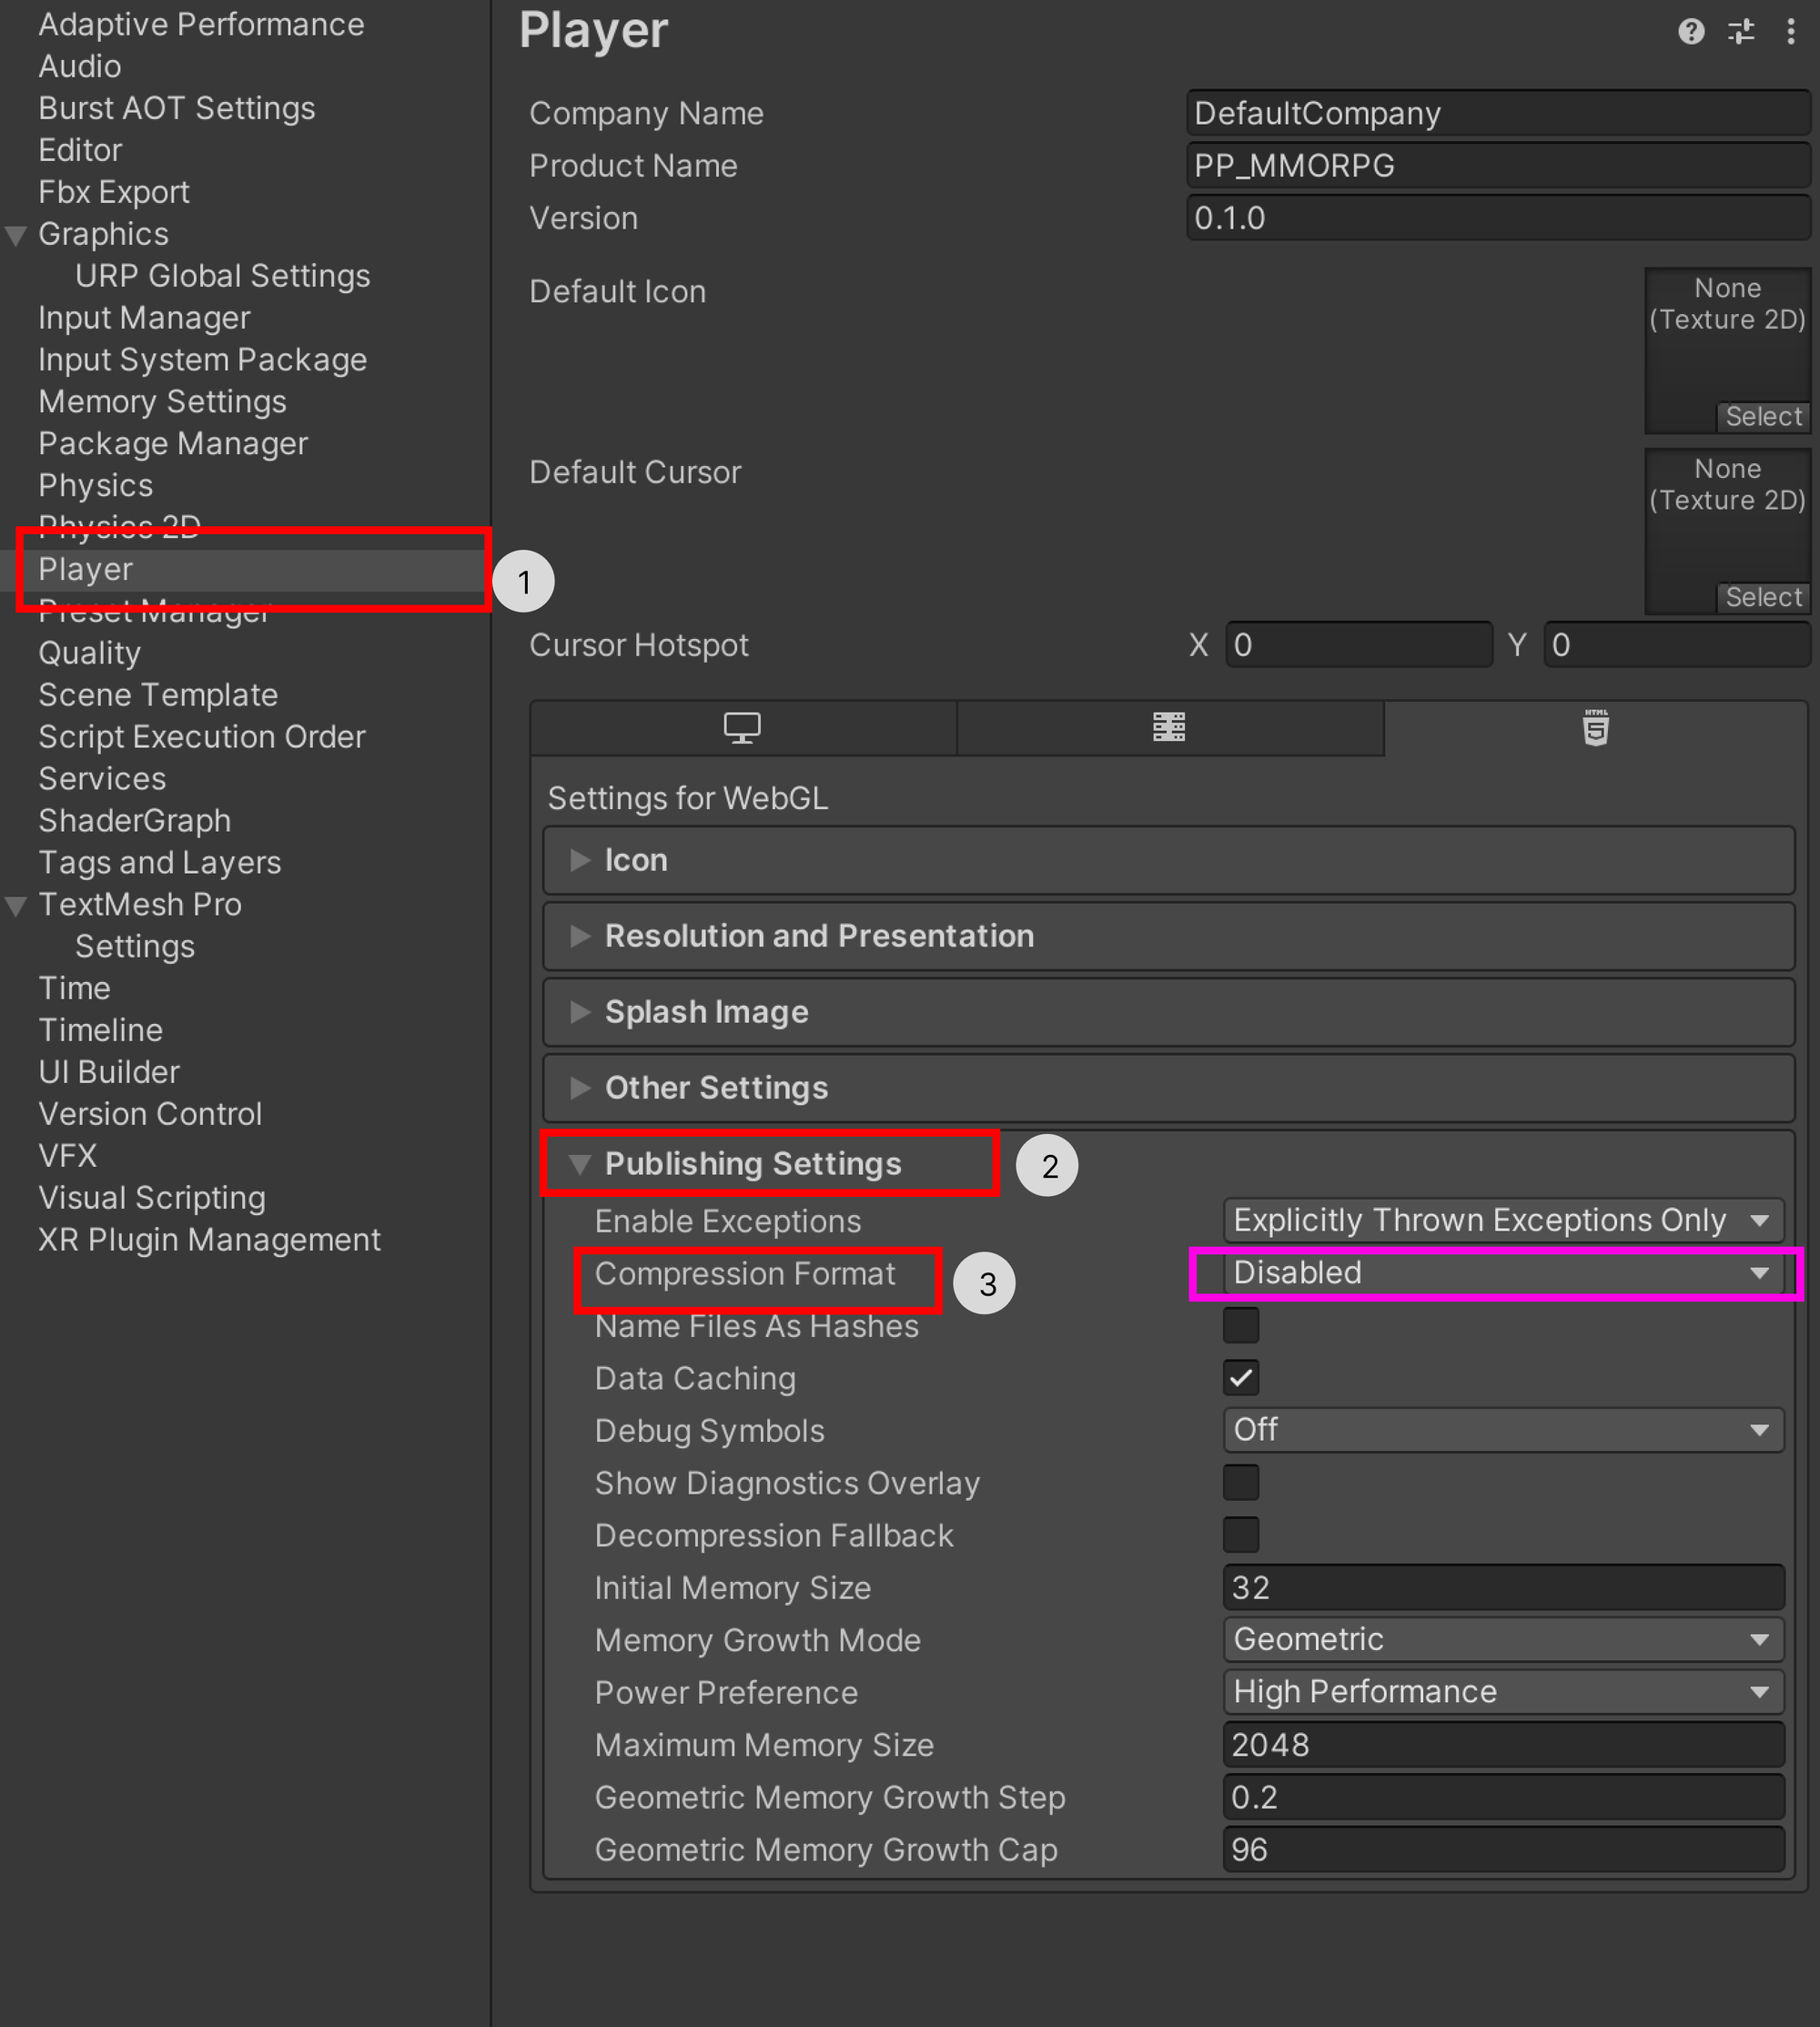
- Set the compression format to Disabled.
- Build process: Build the Unity project and export it as a WebGL application. This allows us to integrate it into the ProtoPie Connect Stage View as a Unity layer.
- Compress files: Compress the build folder into a ZIP file for easy import into ProtoPie.
6.2 Import the Unity build ProtoPie file into ProtoPie Connect Stage View
- Open ProtoPie Connect and create a Pie group.

- Add the Pie from either the cloud or your computer.

- Drag and drop your Pie into the group.

- Hover over the header layer of the group card to reveal icon buttons. Select the View icon.

- A browser window tab will open with Pie. This is called a Stage View. Right-click anywhere on the page to reveal the header menu, and click the edit button at the top right.
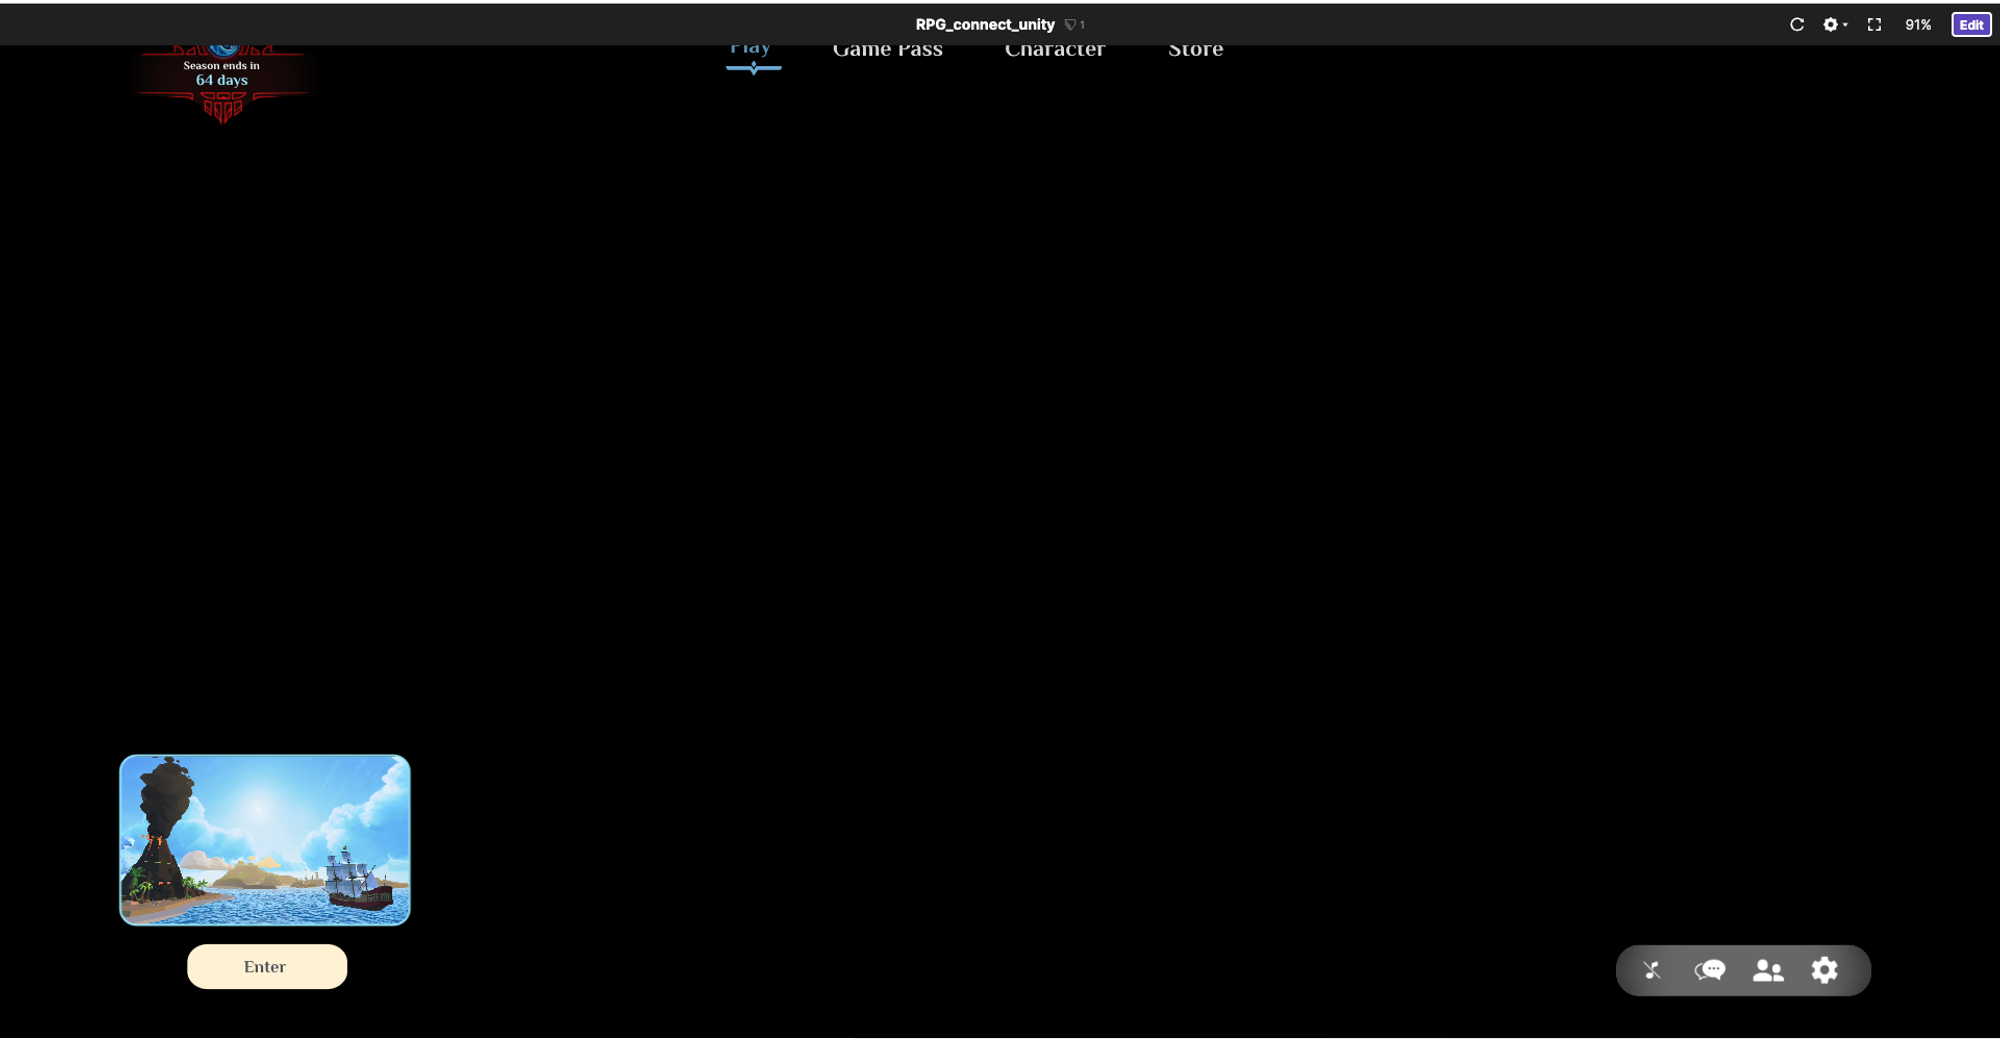
Now, we'll import the Unity build into ProtoPie to complete the integration.
7. Preview and test in ProtoPie Connect
Finally, we'll preview and test the demo to ensure everything works as expected.
- Insert a new Unity layer into the Stage View. This will be the layer where your Unity build will be embedded.
- Reorder the layers as needed. Place the ProtoPie layer at the top and the Unity layer at the bottom so that the UI overlays the Unity layer.
- Import the WebGL build zip file into the newly created Unity layer.
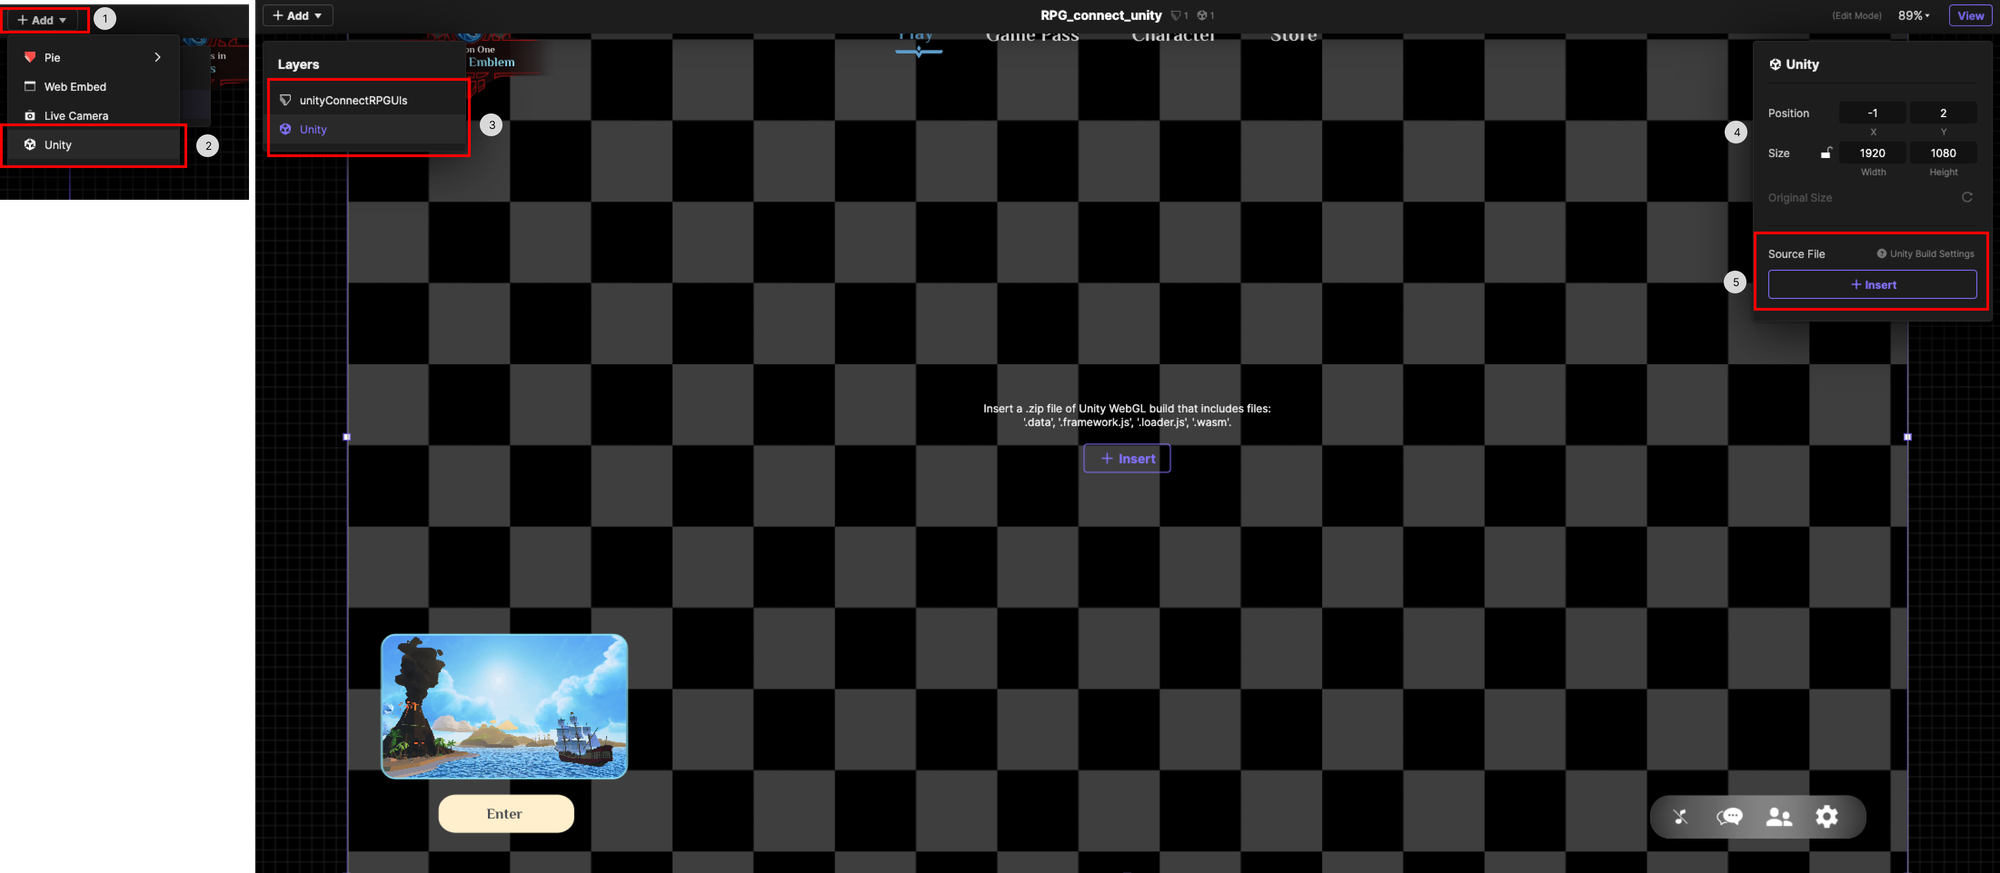
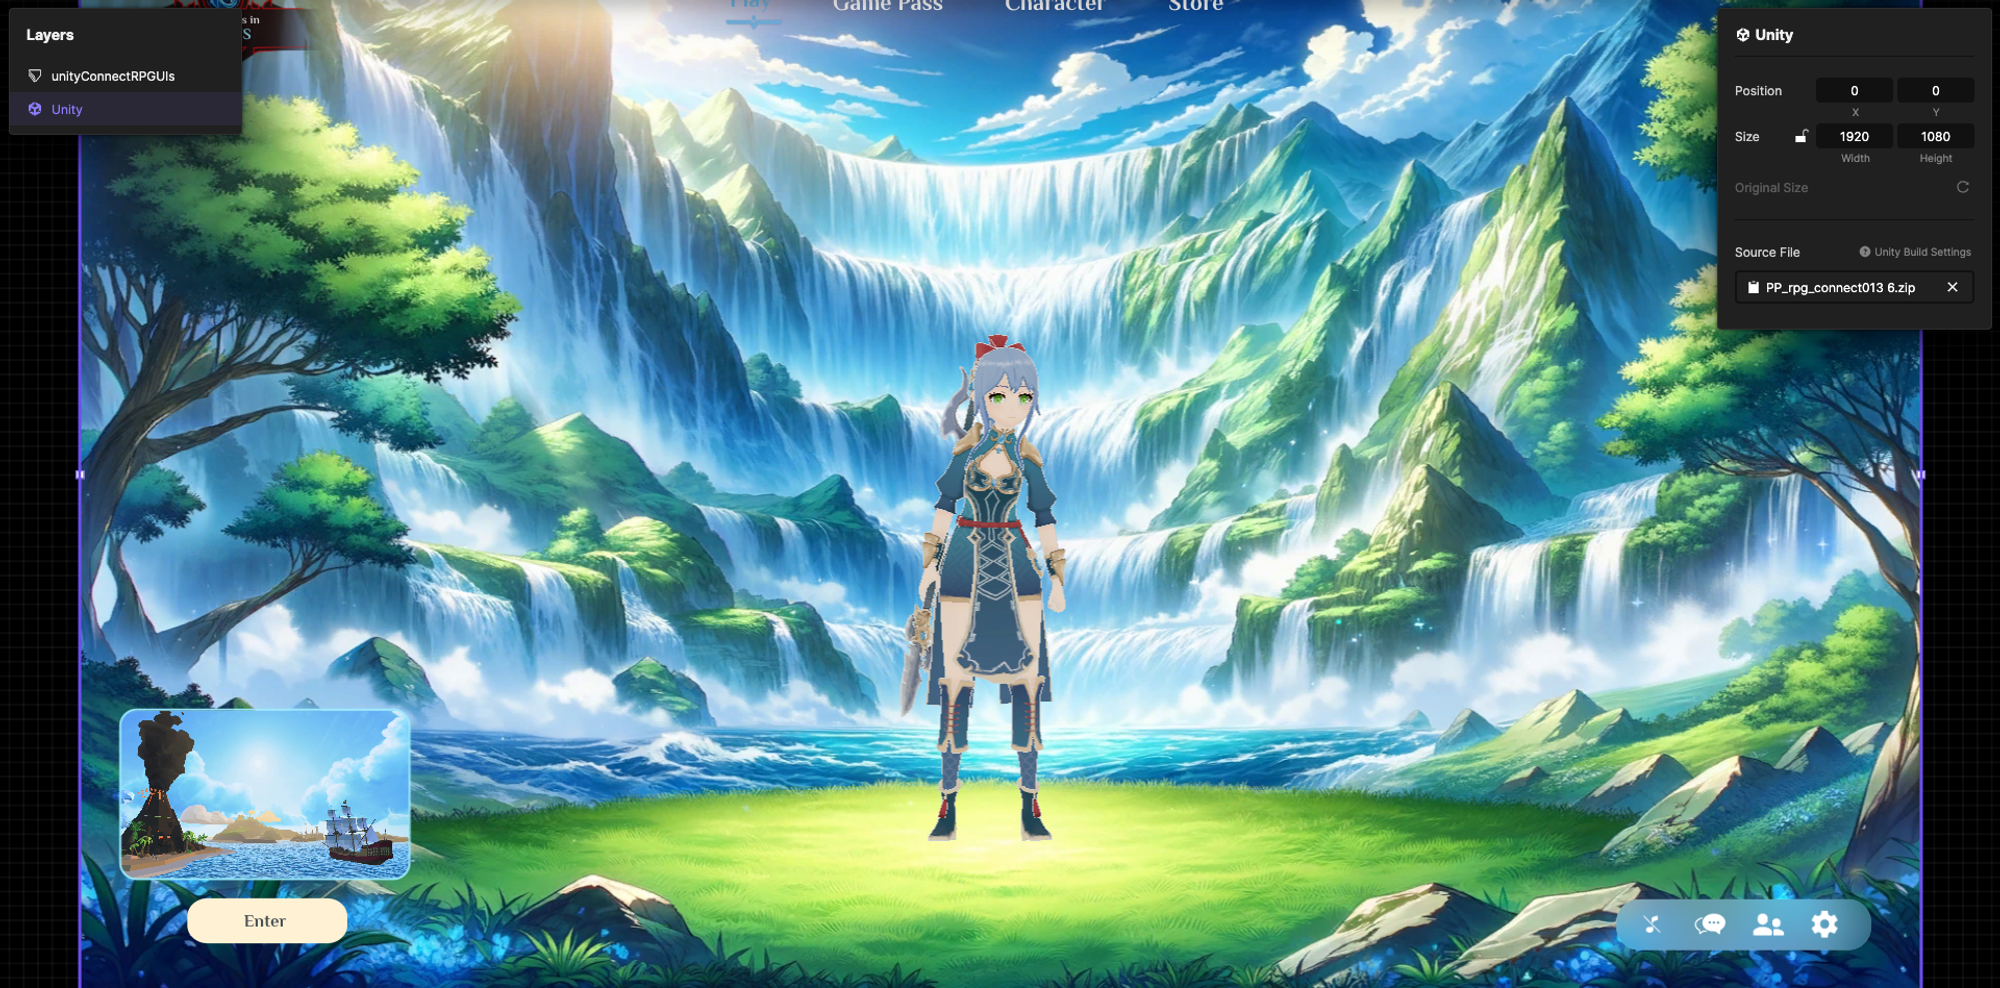
- Go back to View mode by selecting the View button at the top left of the header. Switch to full-screen mode by selecting the full-screen icon in the header menu for a better testing experience or right-clicking anywhere on the screen to hide the header menu.
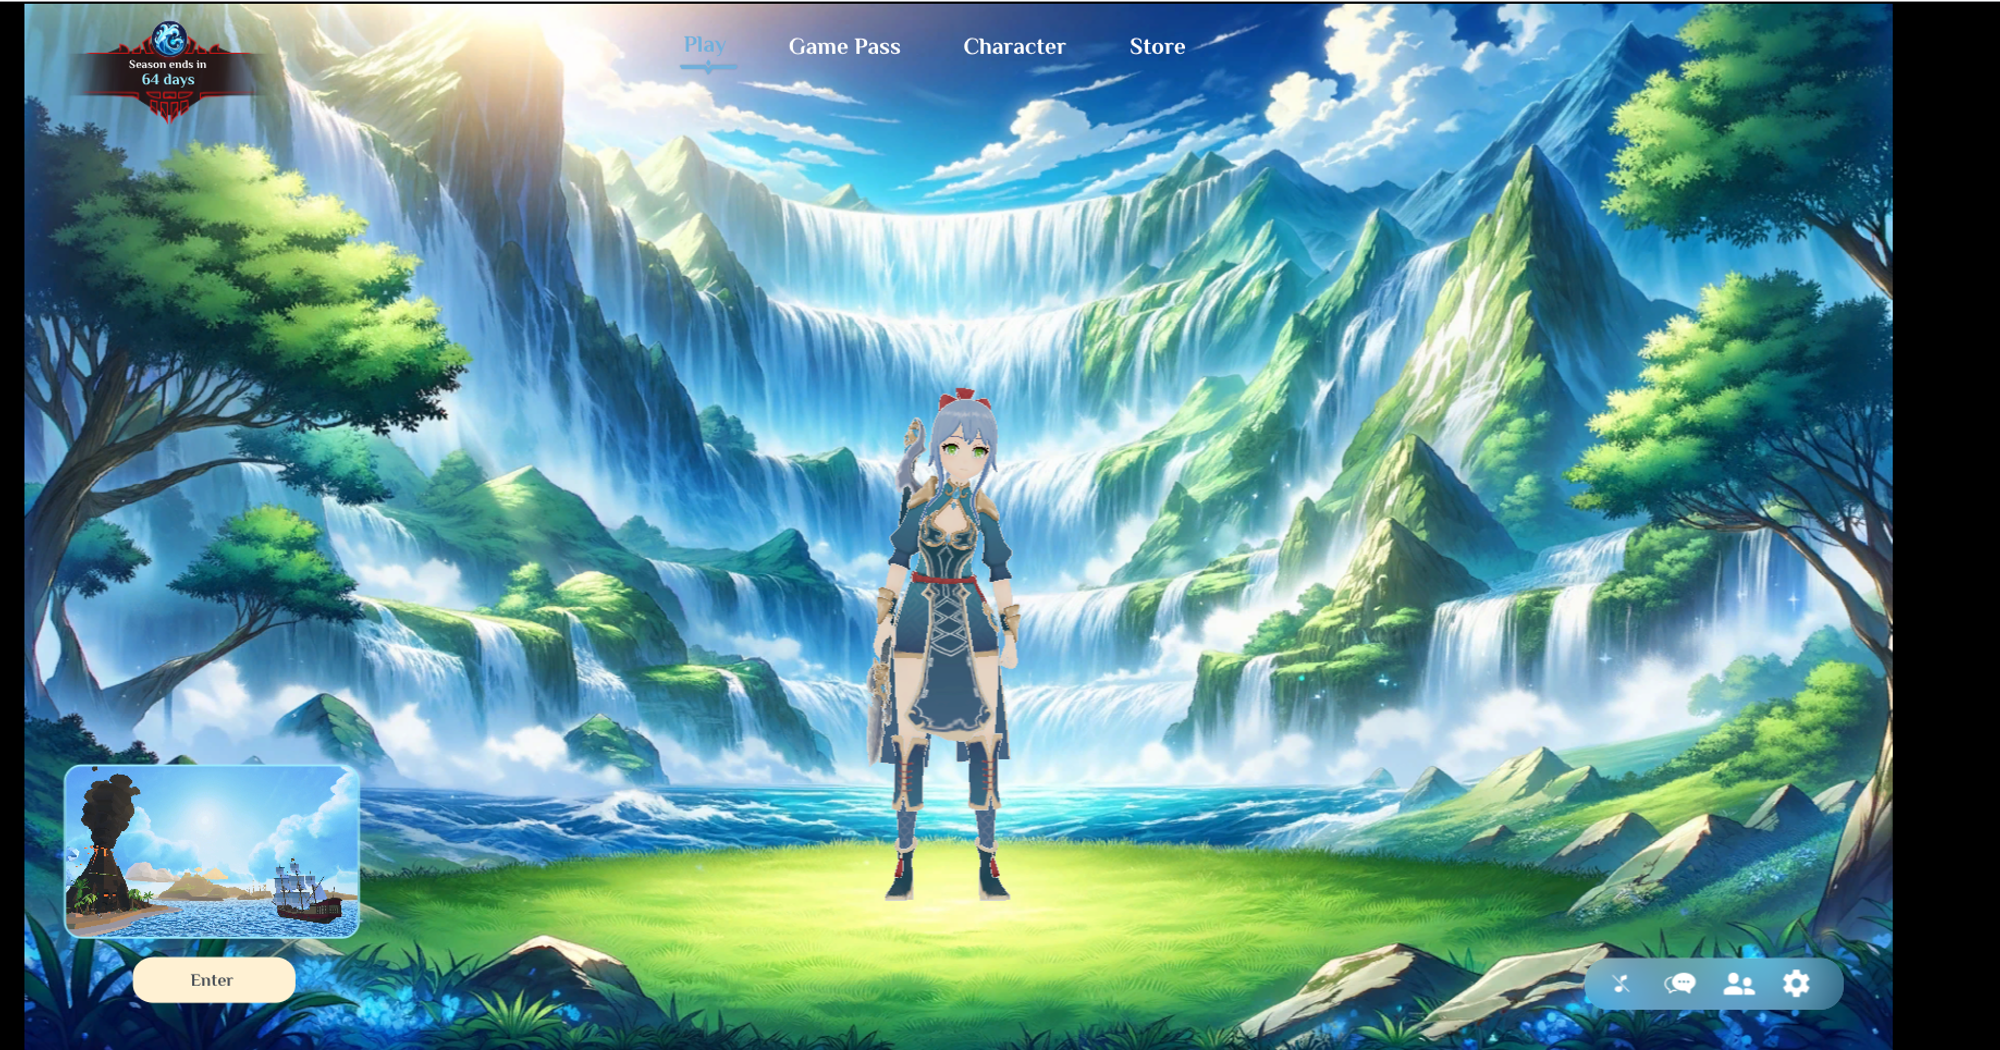
- Test interactions. Click on the various buttons in ProtoPie and observe their interactions. Each button should trigger a corresponding message to Unity, such as navigating between scenes using ProtoPie UI and collecting coins in Unity to trigger ProtoPie responses.
Elevate your game UI prototyping with ProtoPie & Unity
This tutorial showcases the strong integration of ProtoPie with Unity, allowing you to build interactive and responsive game UIs. By following these steps, you can create smooth interactions and improve user experience in your game projects. Download ProtoPie below and begin your game UI prototyping journey for free.
.jpg)
.jpg)
.jpg)